
Hi everyone,
So, I was asked to make a card for my husband’s grandfather’s birthday.
Normally when I am asked to make a card, ideas come flooding in. Every time I am asked to make a card for this particular man, I lose all inspiration. It’s not because I don’t have any creative drive or little affection for the man… quite the opposite. I tend to struggle with cards for men, and this is a rather special recipient. This is one of those times when I want to create perfection.
After some deep thinking, I came up with this card. It was remarkably easy once I worked out the idea, and I thought maybe it would be a good one to share for those times when inspiration eludes us.
 What you will need for this is cardstock, sticky stuff, some Ranger Foil Sheets and a die cutting machine. I still love my (very old) Cricut so I pulled her out with the Beyond Birthdays cartridge to get started. I selected the ‘Happy Birthday’ image on the shadow setting and cut it at 2 inch.
 After removing my die cut from the mat, I fed it through my Xyron Create-A-Sticker machine. Since I wanted it sticky on both sides, I flipped it over and fed it through a second time. To help the image go through again, I trimmed down the backing piece before feeding it through.
I pulled off the backing covering the top side of the image. While this will create a layer of glue in the negative space, that’s ok. It can be easily removed later.
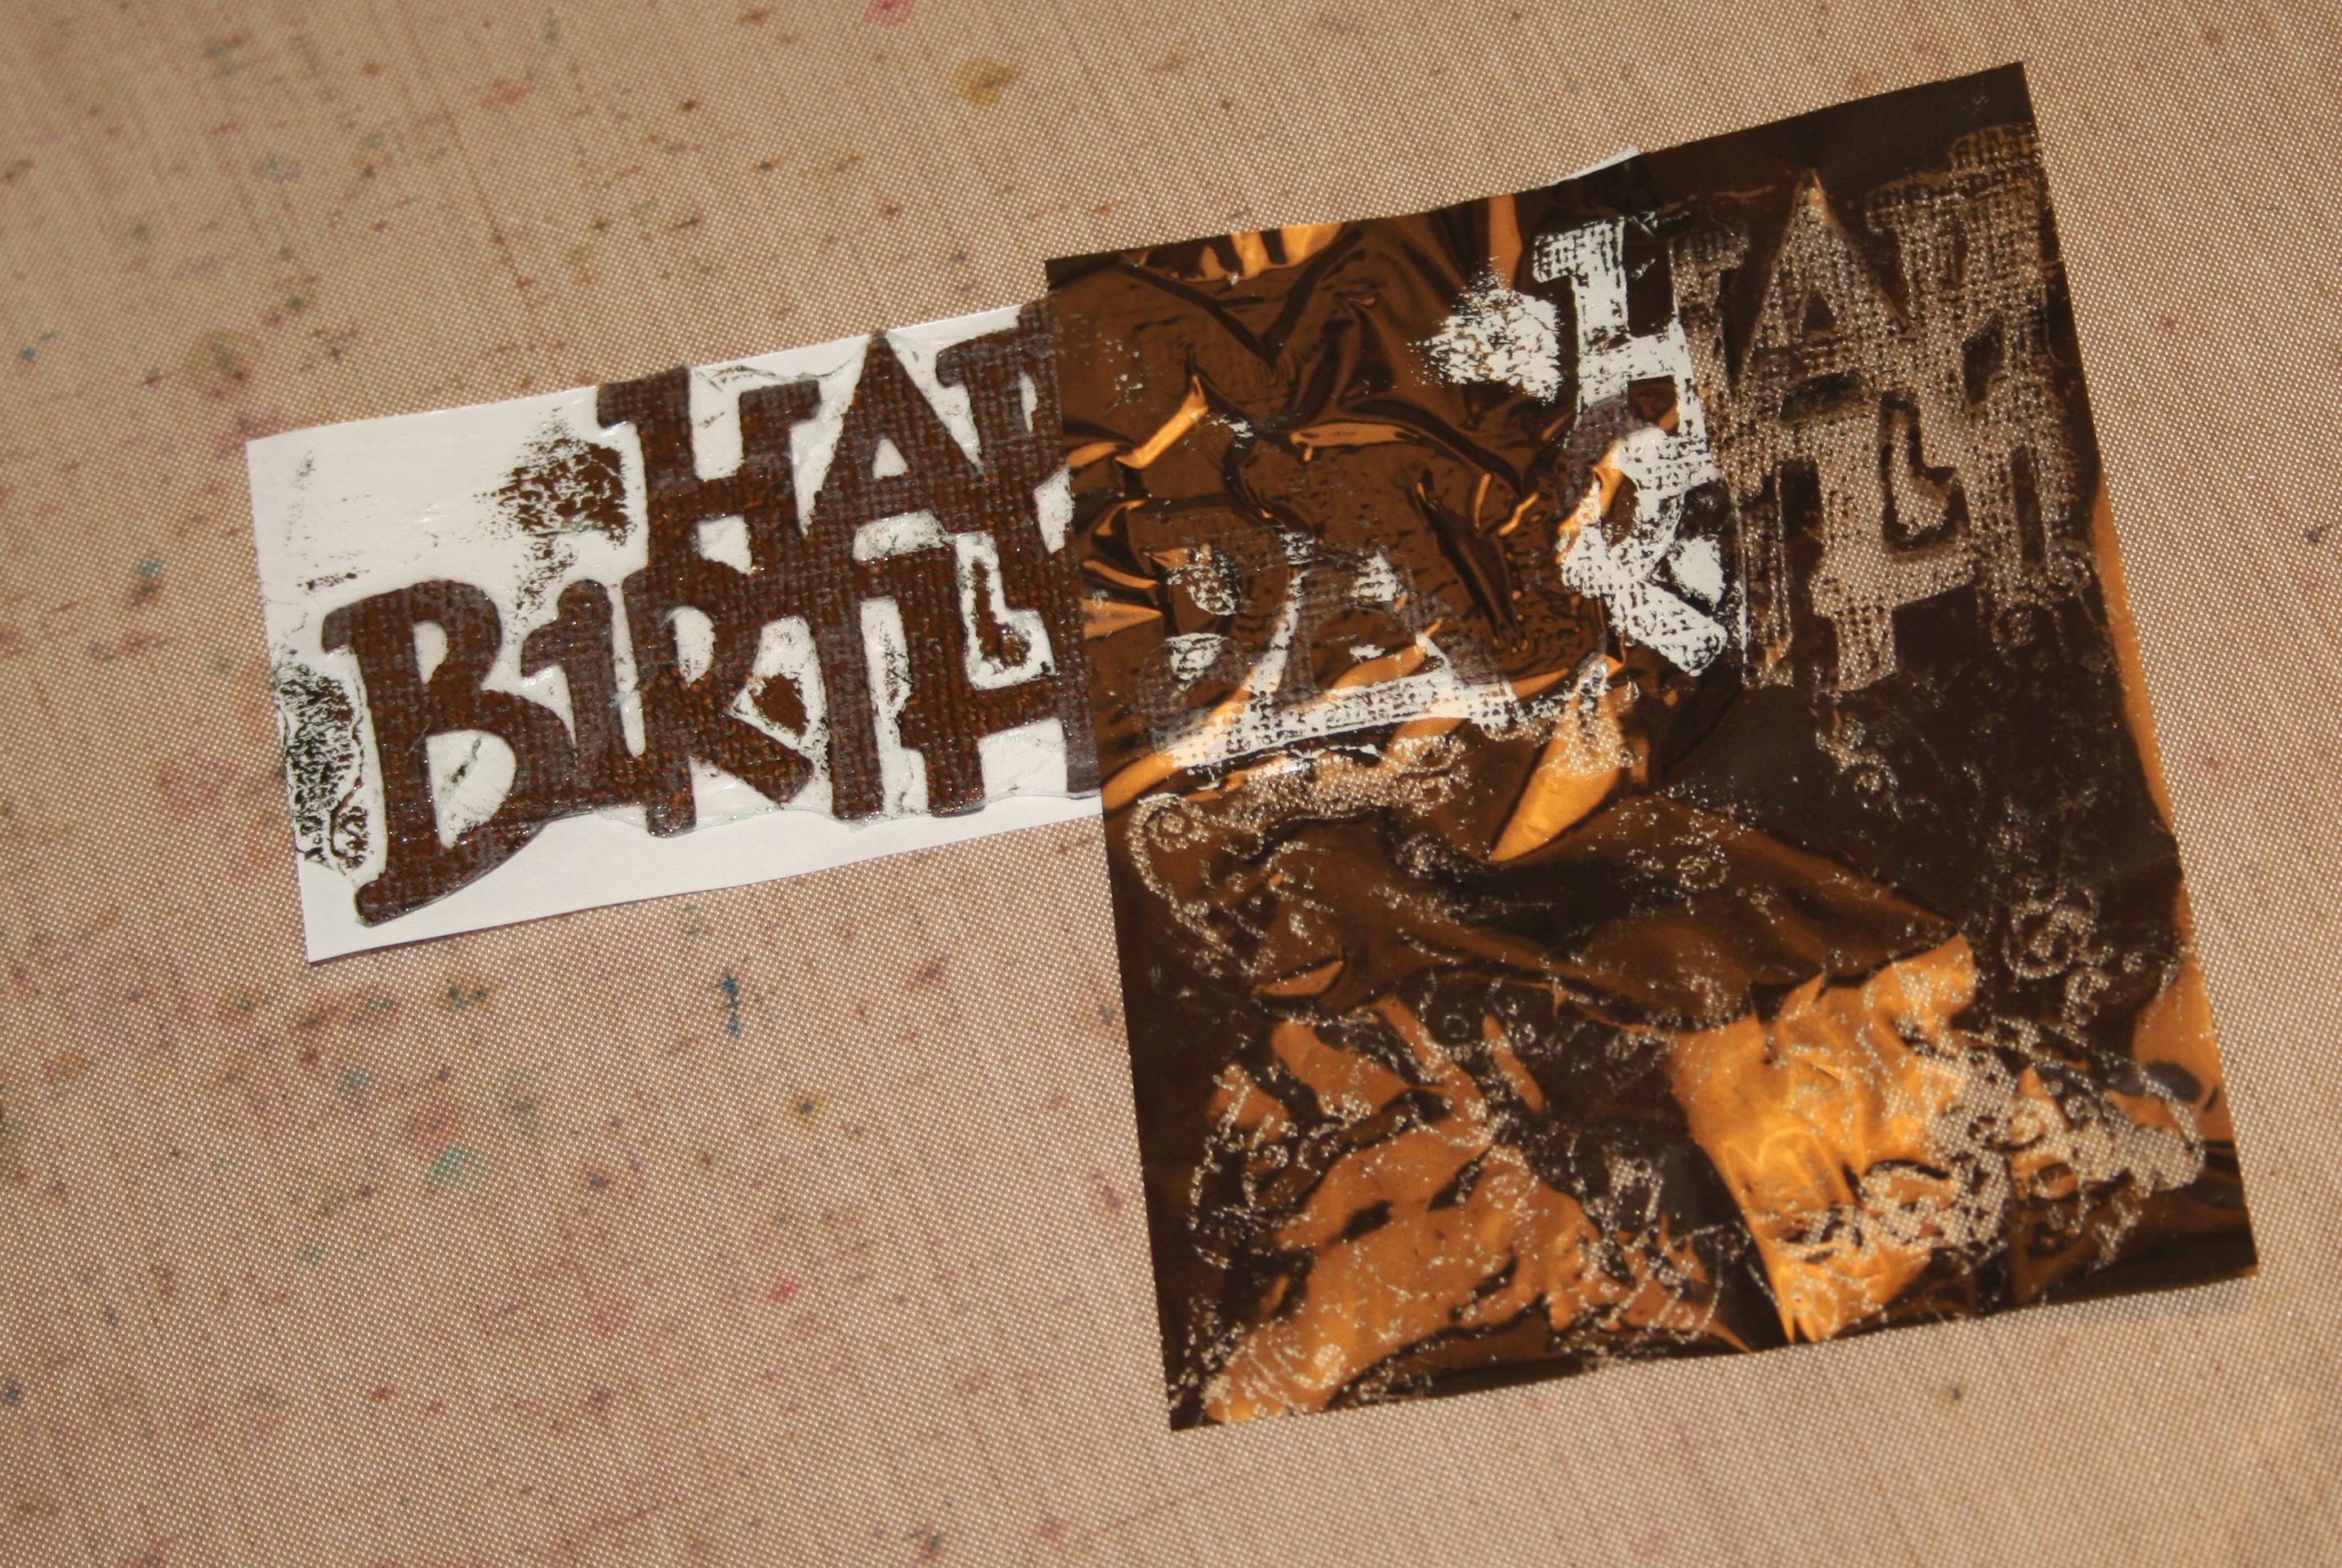 The Ranger Foil Sheets are super easy to use. All I needed to do was press the ‘ugly’ side down (all you need is a light pressure with your fingers) on an adhesive and gently peel it off. If you would like a distressed look like I did here, just choose a different color foil and go over the blank areas. Press, gently remove, repeat until you have the look you like!
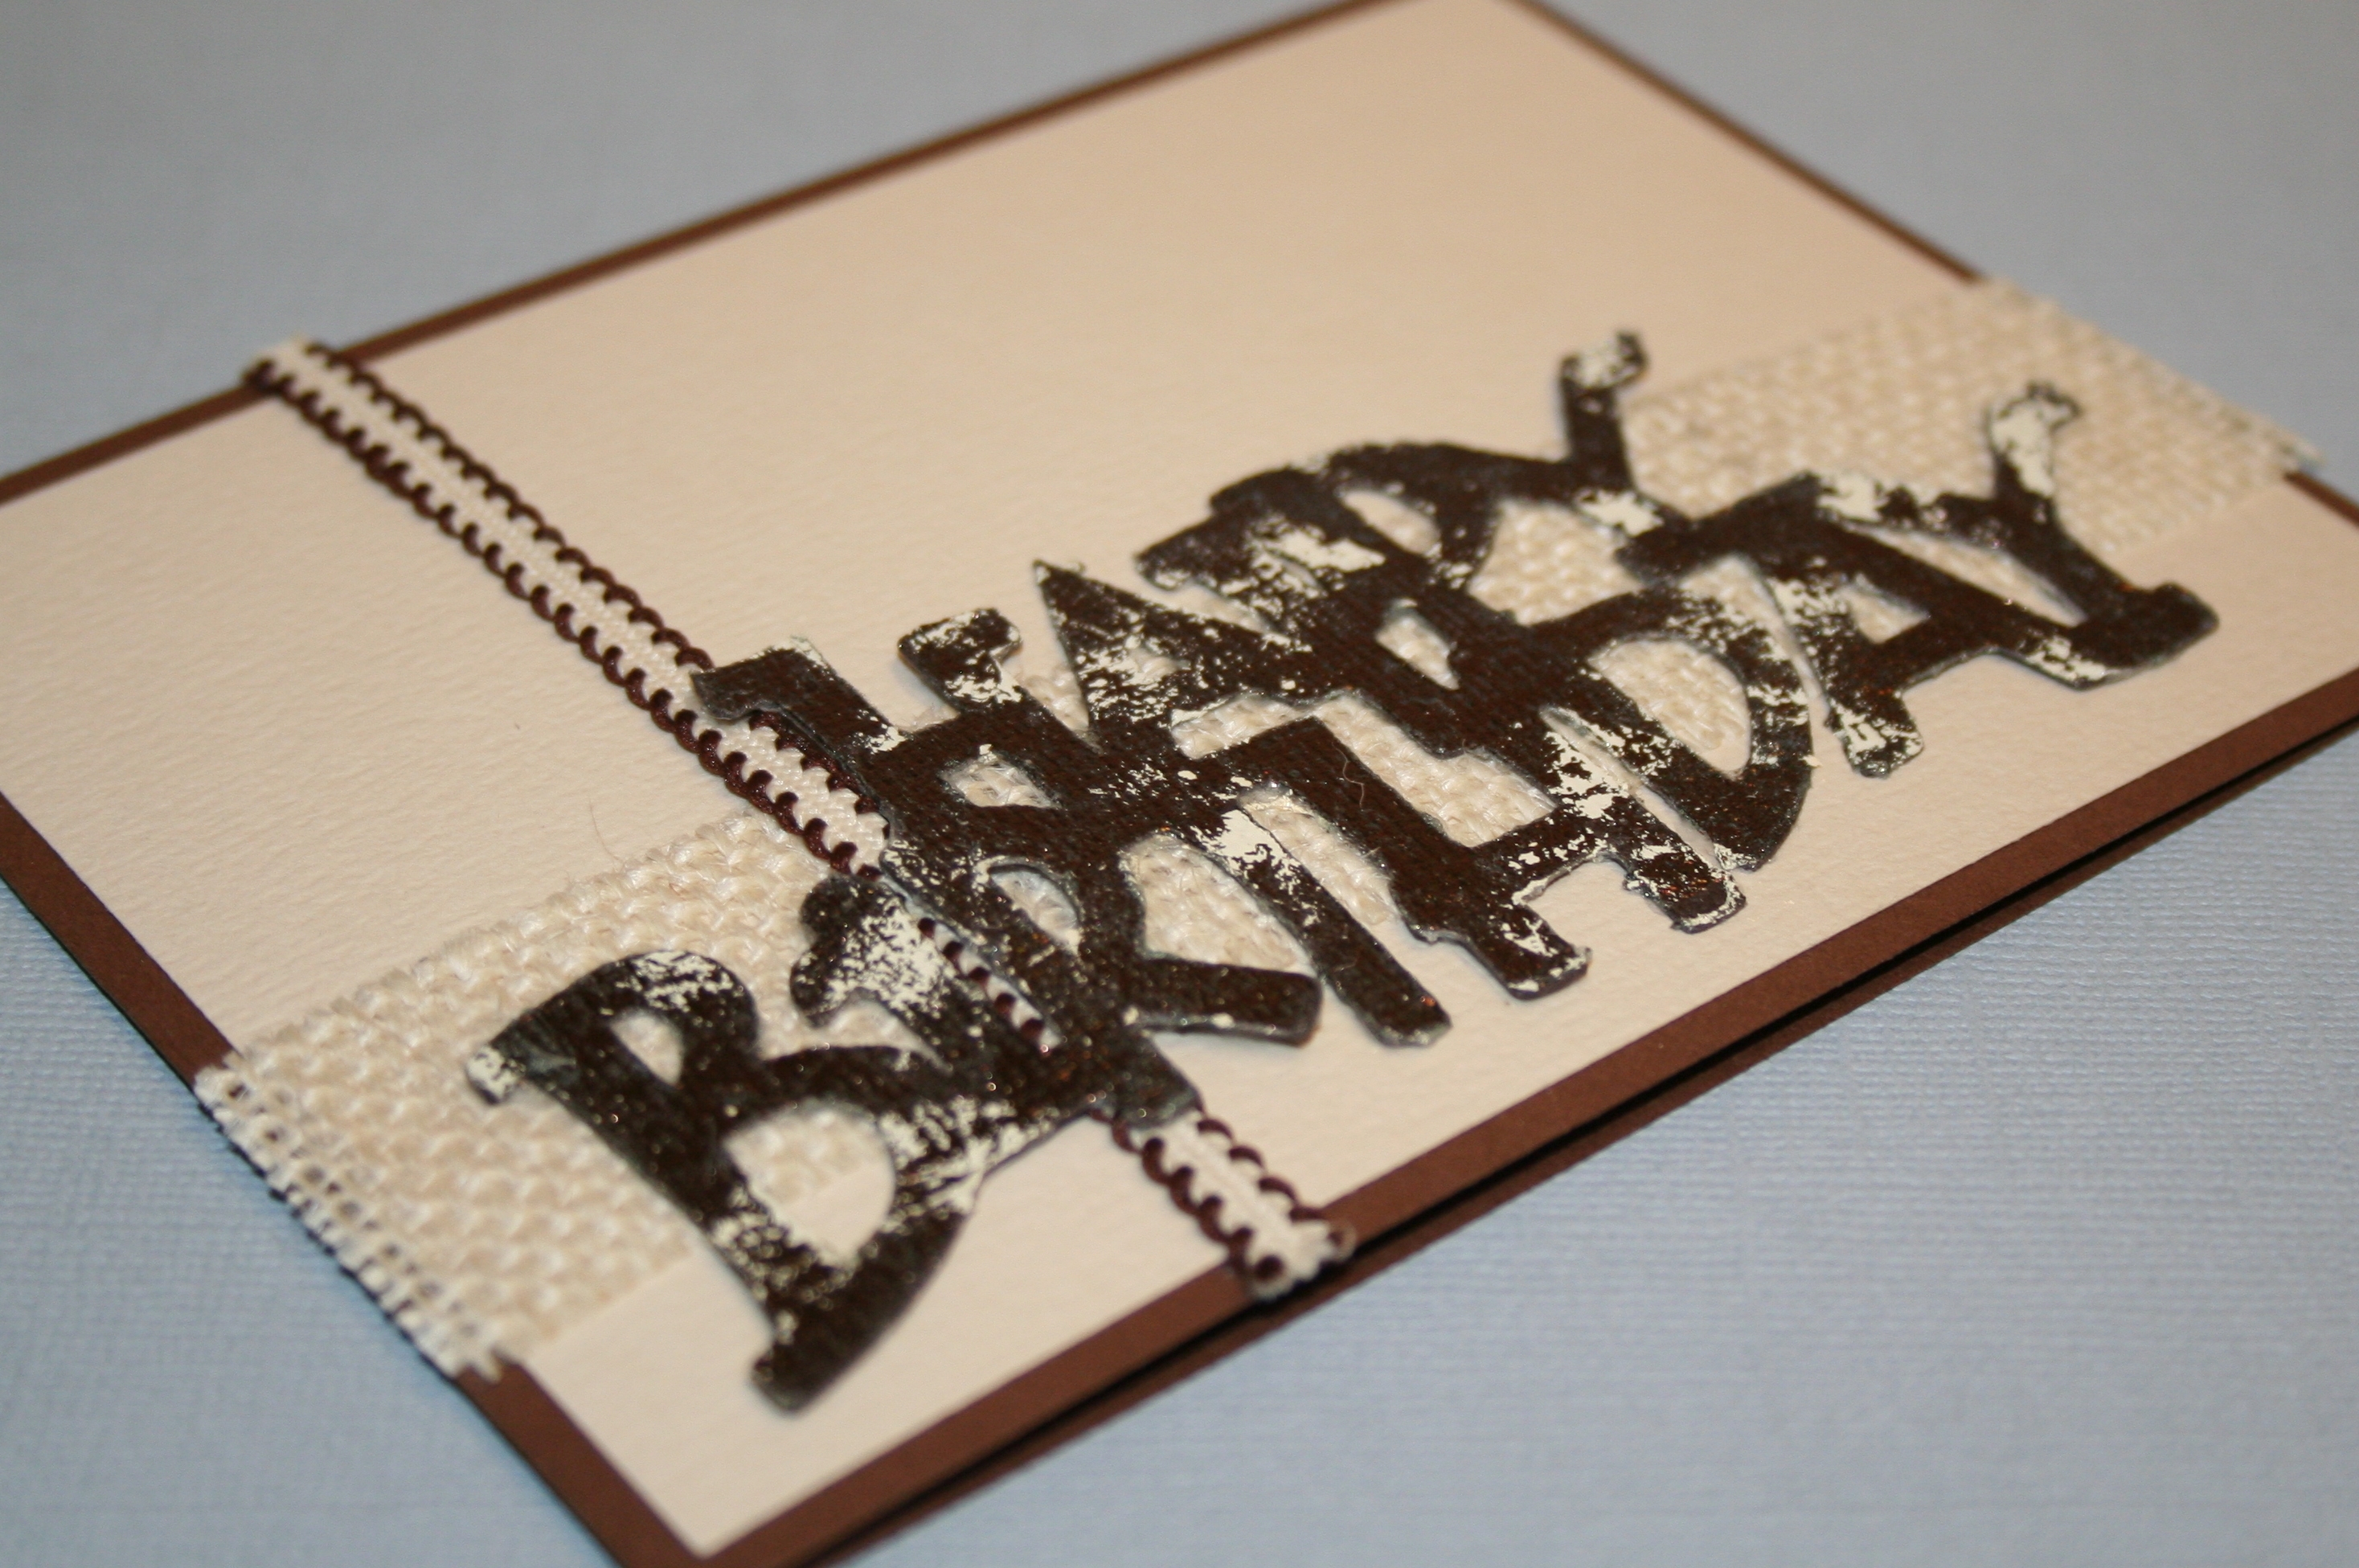
 Once my ‘Happy Birthday’ piece had that pretty distressed foil look, I chose a card blank I had previously made using Bazzill brown Cardstock. I chose a second piece of Bazzill cardstock in cream for the layering. The notecard measured 5.5 inch x 4.25 inch. I cut the cream piece approximately 5.25 inch x 4 inch and attached it using double sided tape. I cut a piece of Recollections burlap to a 1 inch width and glued it down using Ranger Multi Medium Matte. Wanting a bit more dimension I chose a piece of Recollections ribbon and stuck it on using the same glue.
 Before attaching the ‘Happy Birthday’ die cut, I removed the backing to reveal the glue. There was a fair amount of glue in the negative space so using a pair of tweezers, I gently pulled the excess toward the back of the die cut. I removed the pieces that detached easily and folded over the pieces that remained attached.
To ensure the card survived the mail all the way to Australia, I added a few drops of the Ranger Multi Medium to the back of the die cut and attached it to the card.
 To finish it all off, I went over the image one more time with a foil sheet to cover all the sticky bits. This gave it more of a polished look and made sure there was no areas of adhesive left uncovered. I then gently cut off the ends of the ribbon and burlap so that they were flush with the card.
While it’s not quite the perfection I want (there is ALWAYS room for learning and improvement) I am really pleased with the result and am sure he will like it!
I know we all have those tough projects we take on. What themes do you struggle with the most? What are your fall back techniques? Leave a comment and let us know!
Materials used:
- Cricut cutter with Beyond Birthdays cartridge
- Bazzill Basics Cardstock
- Xyron Create-A-Sticker 2.5 inch machine
- Ranger Foil Sheets (Vintage)
- Ranger Mulit Medium Matte
- Recollections Burlap
- Recollections Ribbon
- Quilled Creations Quilling Tweezers
- Double Sided Tape
