Hi Everyone,
Alcohol Ink! I could go on and on about why these inks are a personal favorite of mine. I love the vibrant colors, the way they blend in such interesting ways, and the wonderful results that are always achieved. They can be used in so many ways to create landscapes, amazing florals, beautiful patterns, and even some of the most incredible kaleidoscope style backgrounds. How can anyone not love these products?!
I recently found another awesome use for my ever-growing collection.
While putting together a little box of Chocolates for my mom, I realized that the only gift wrap ribbon I had in the house was White, Purple or Christmas colors. The packaging on the chocolates was a light pink and green. The purple would clash and the Christmas red or green would just look odd, so I picked up the white ribbon and looked around my craft room. My eyes fell on my tin of Alcohol Inks. Perfect!
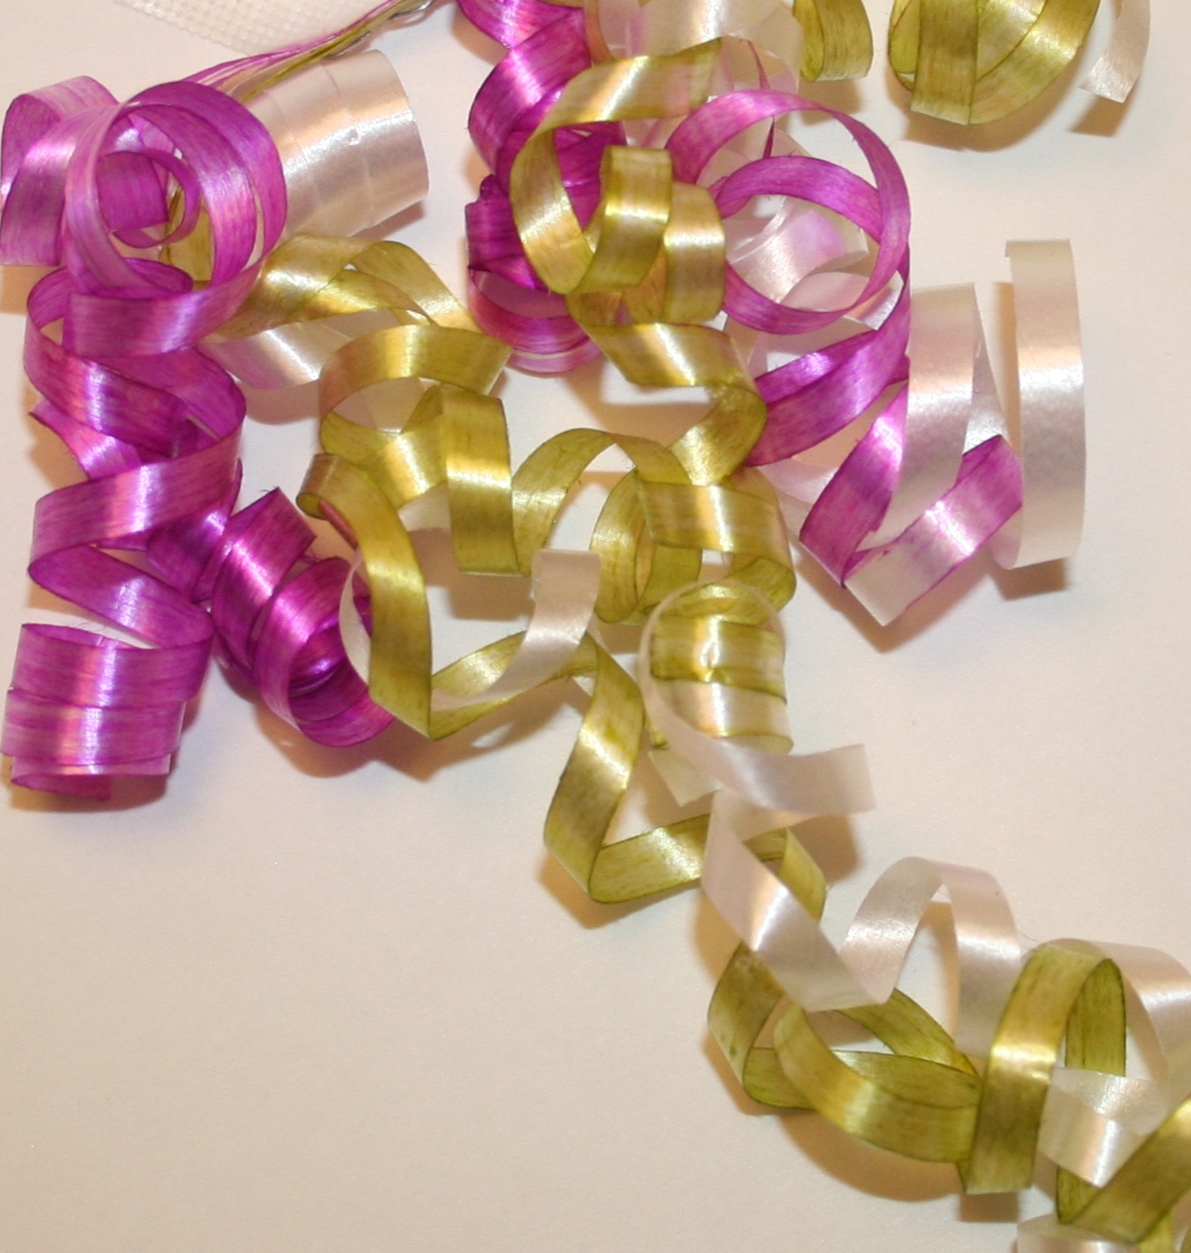
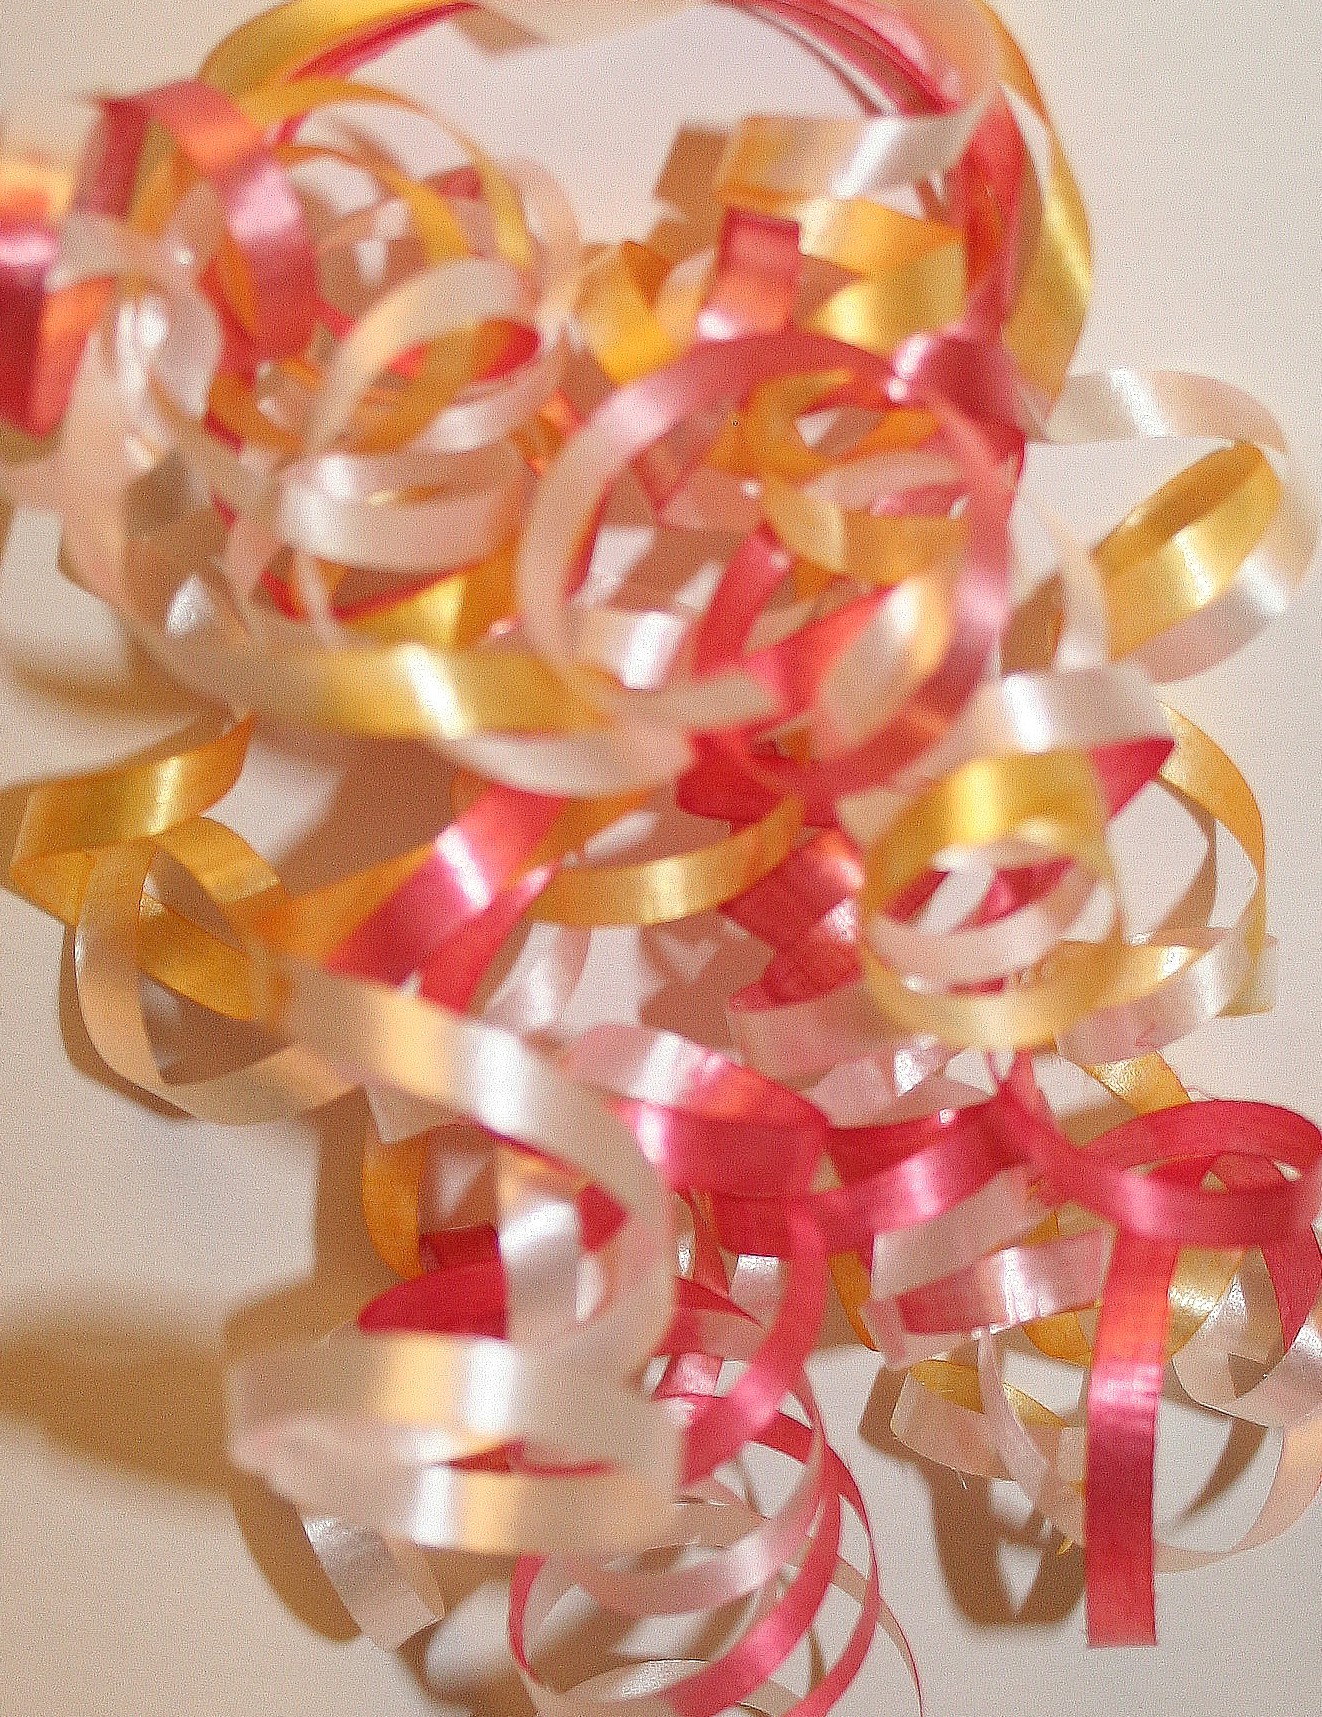
The plain white ribbon ended up being a pretty green, pink and white combination. It was lovely and my Mom liked hearing how I created a matching ribbon cluster. I know that I will never buy a pack of gift wrap ribbon again now since I can make some pretty cool bows and clusters with unique shades.
I got home after our family celebration for Mother’s Day and once again pulled out my little bottles of liquid magic. So many colors, ideas, and projects fluttering around in my brain! Time to play!
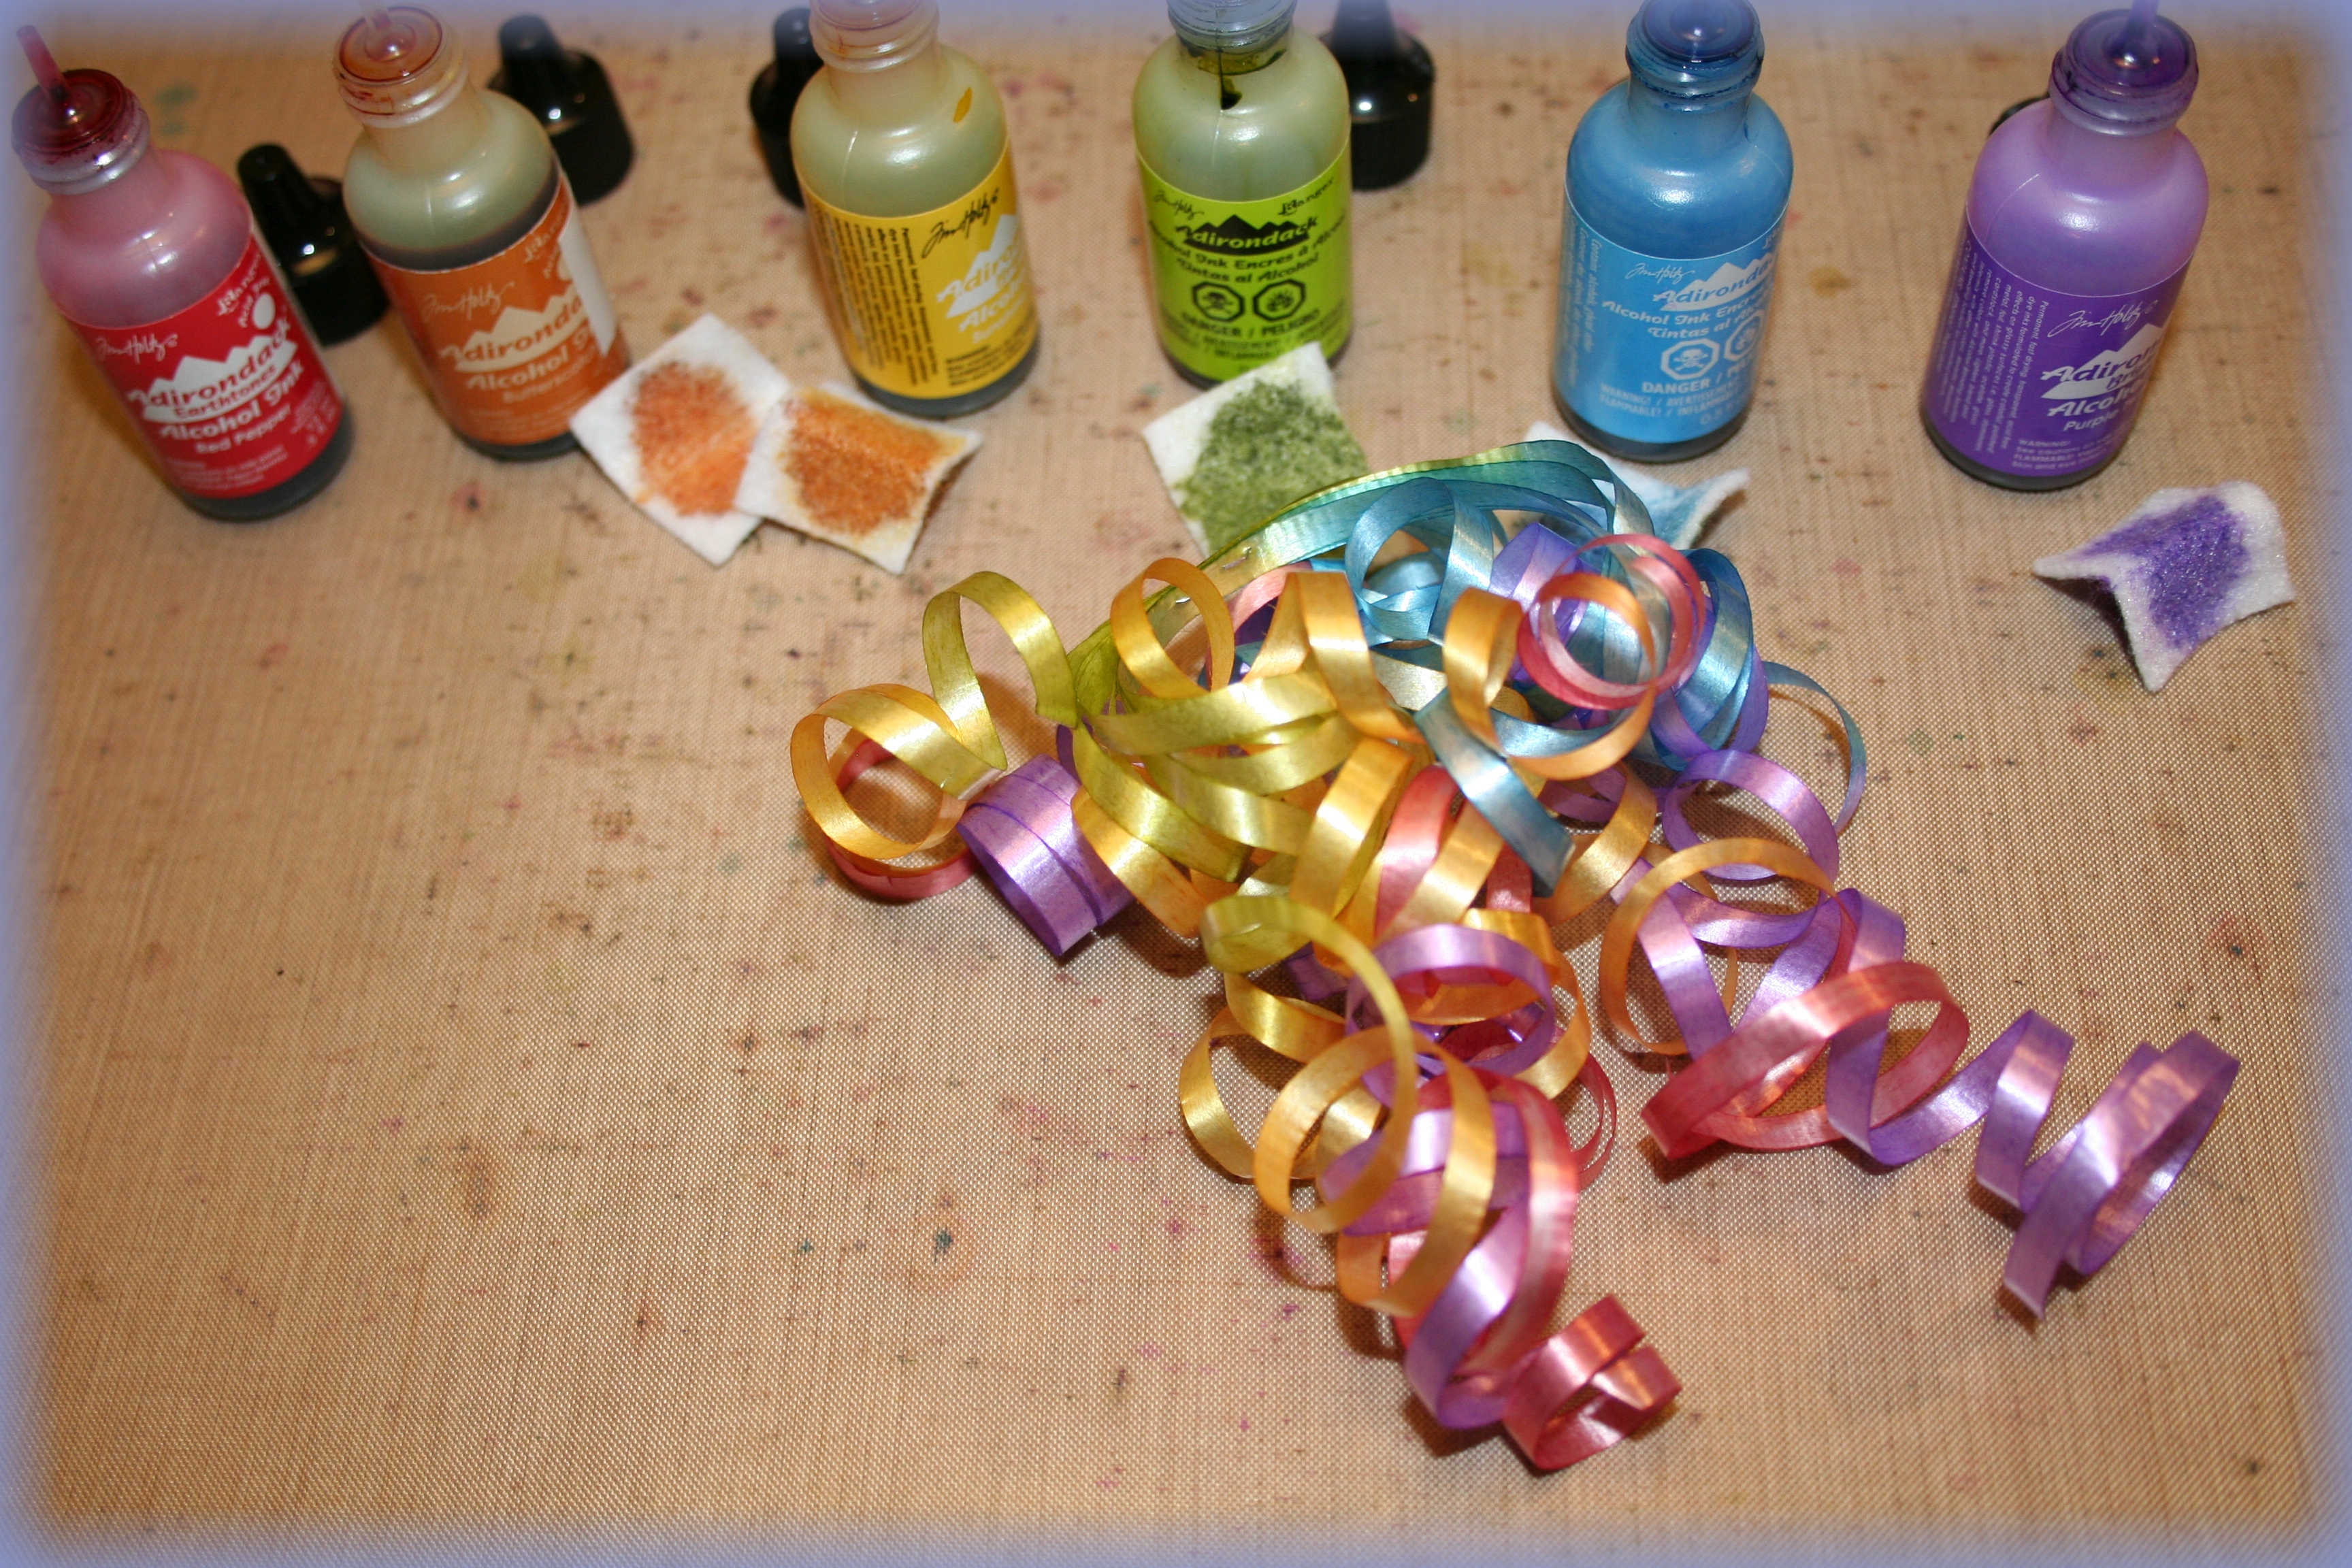
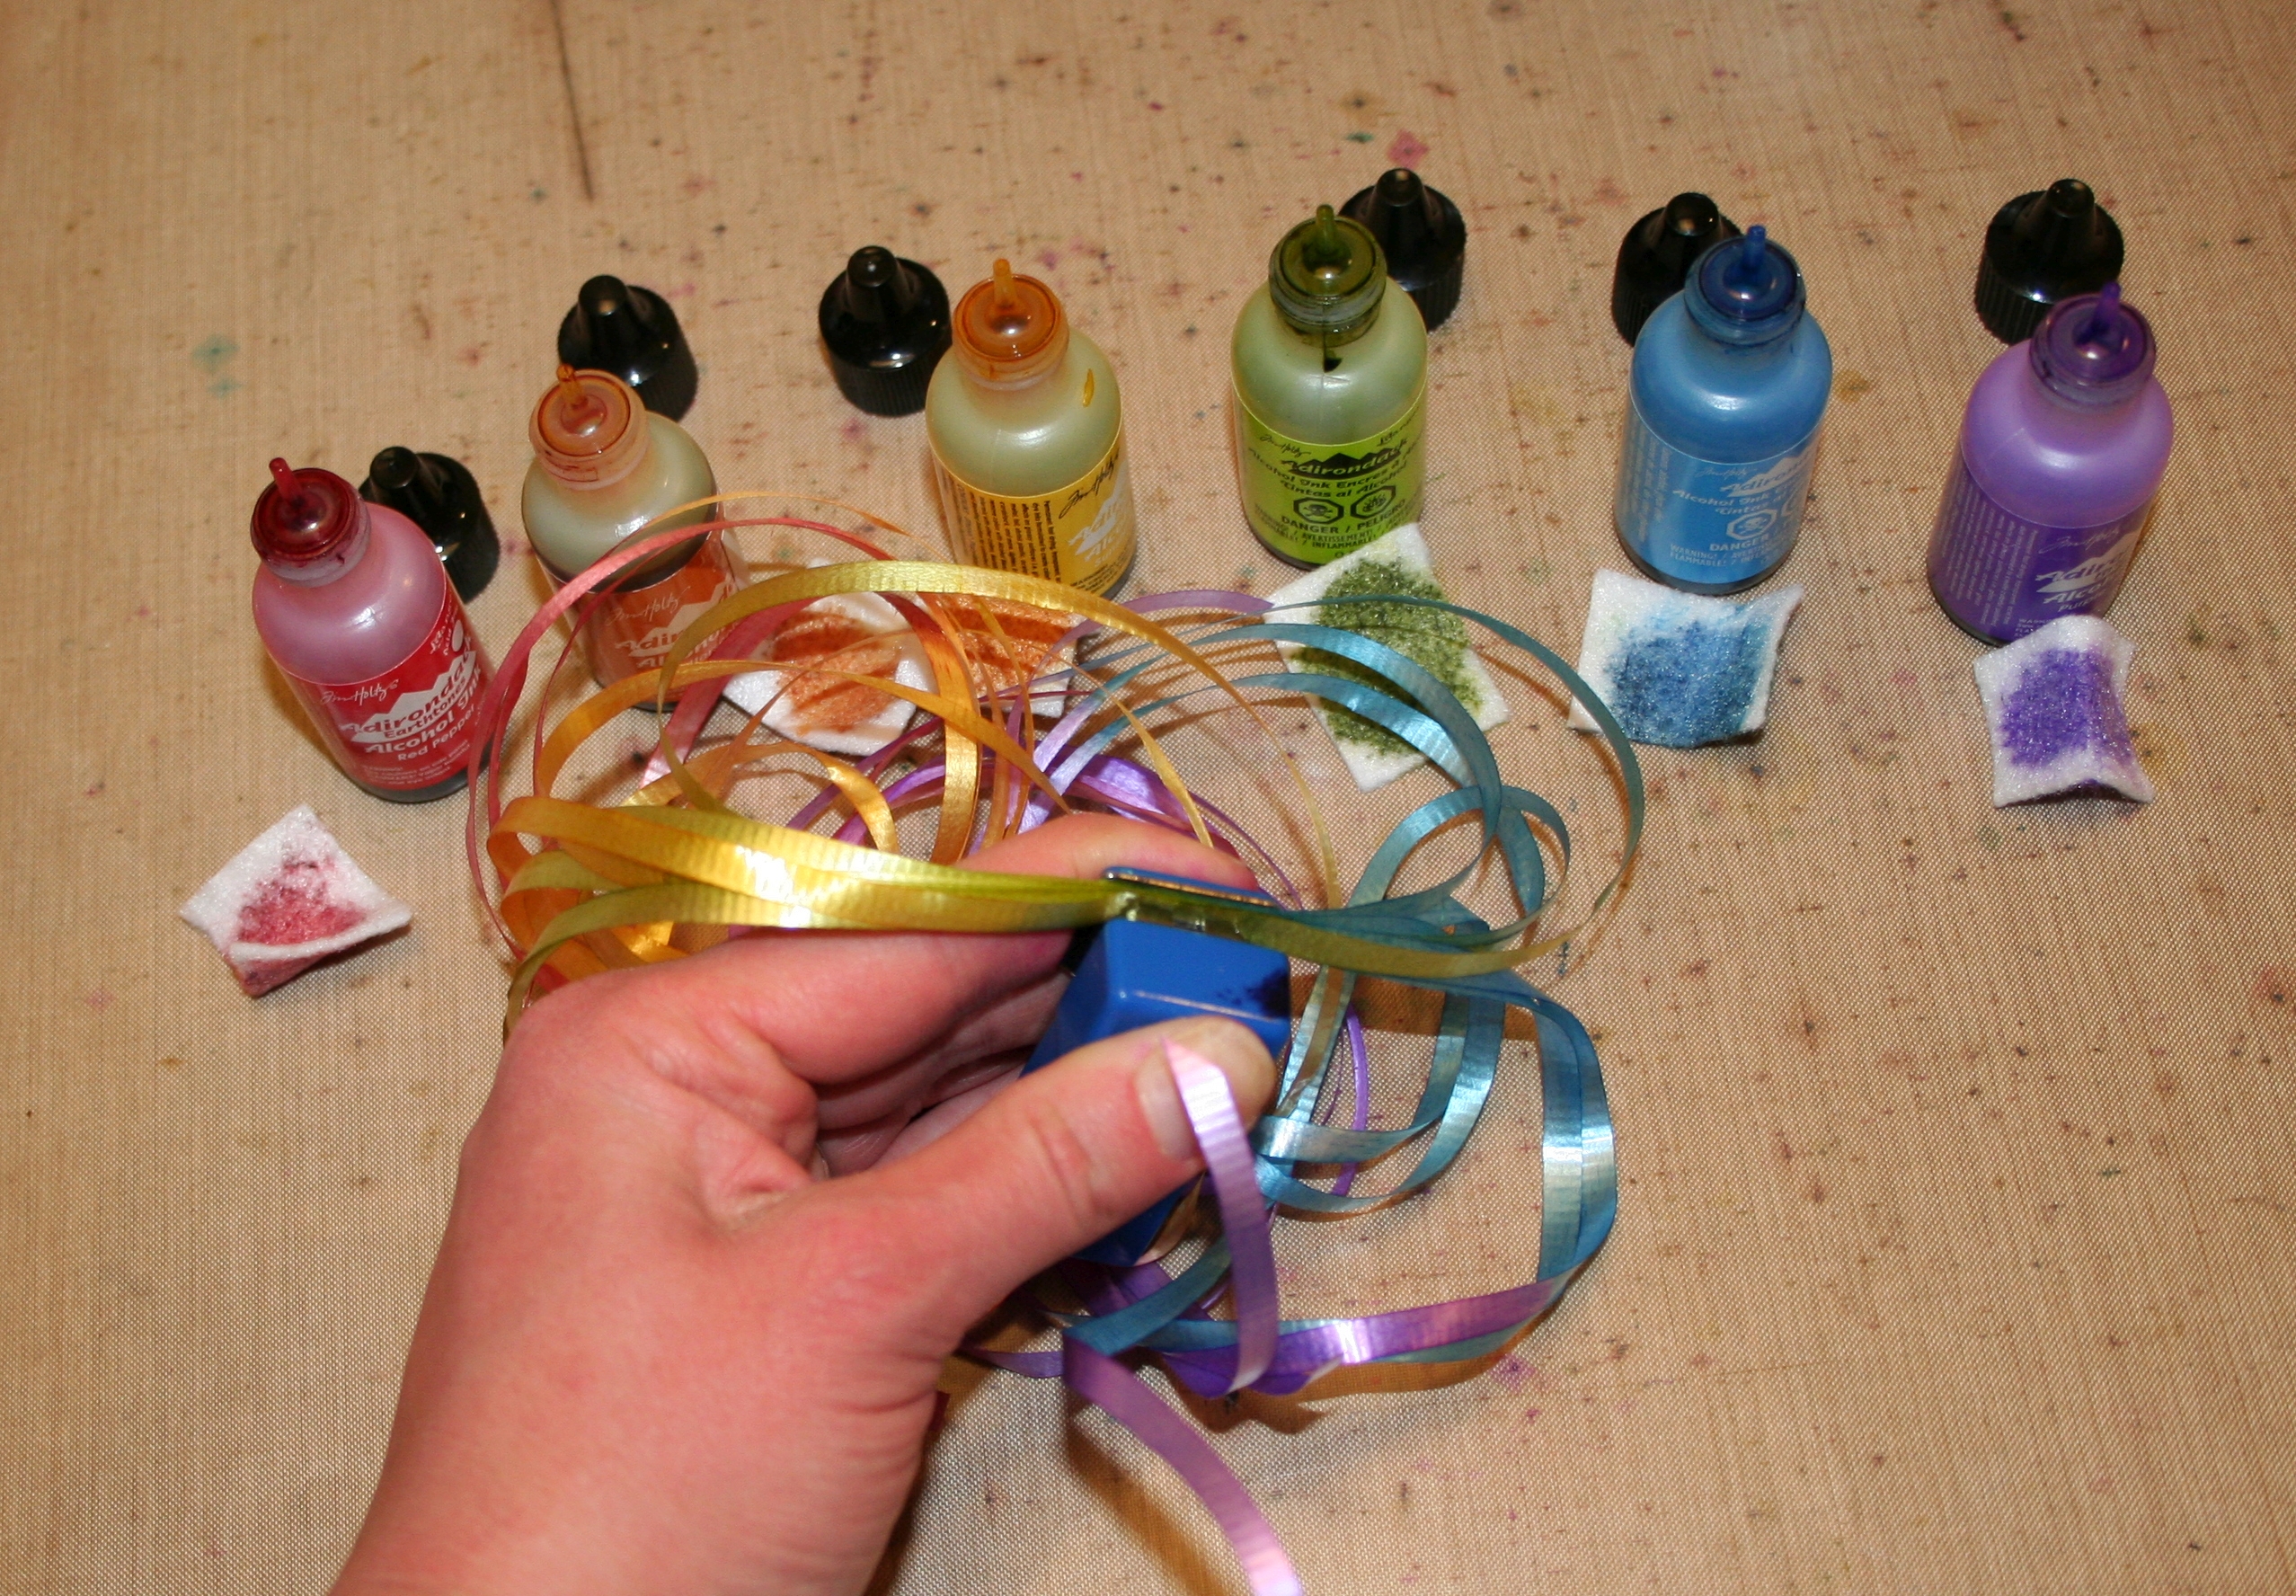
 My process for creating these ribbon clusters is a simple one with few steps. I started by cutting a selection of various lengths of white ribbon. It’s inexpensive craft ribbon from the gift wrap section of my local dollar store. I then selected my Alcohol Ink colors and cut some felt pieces into small squares.
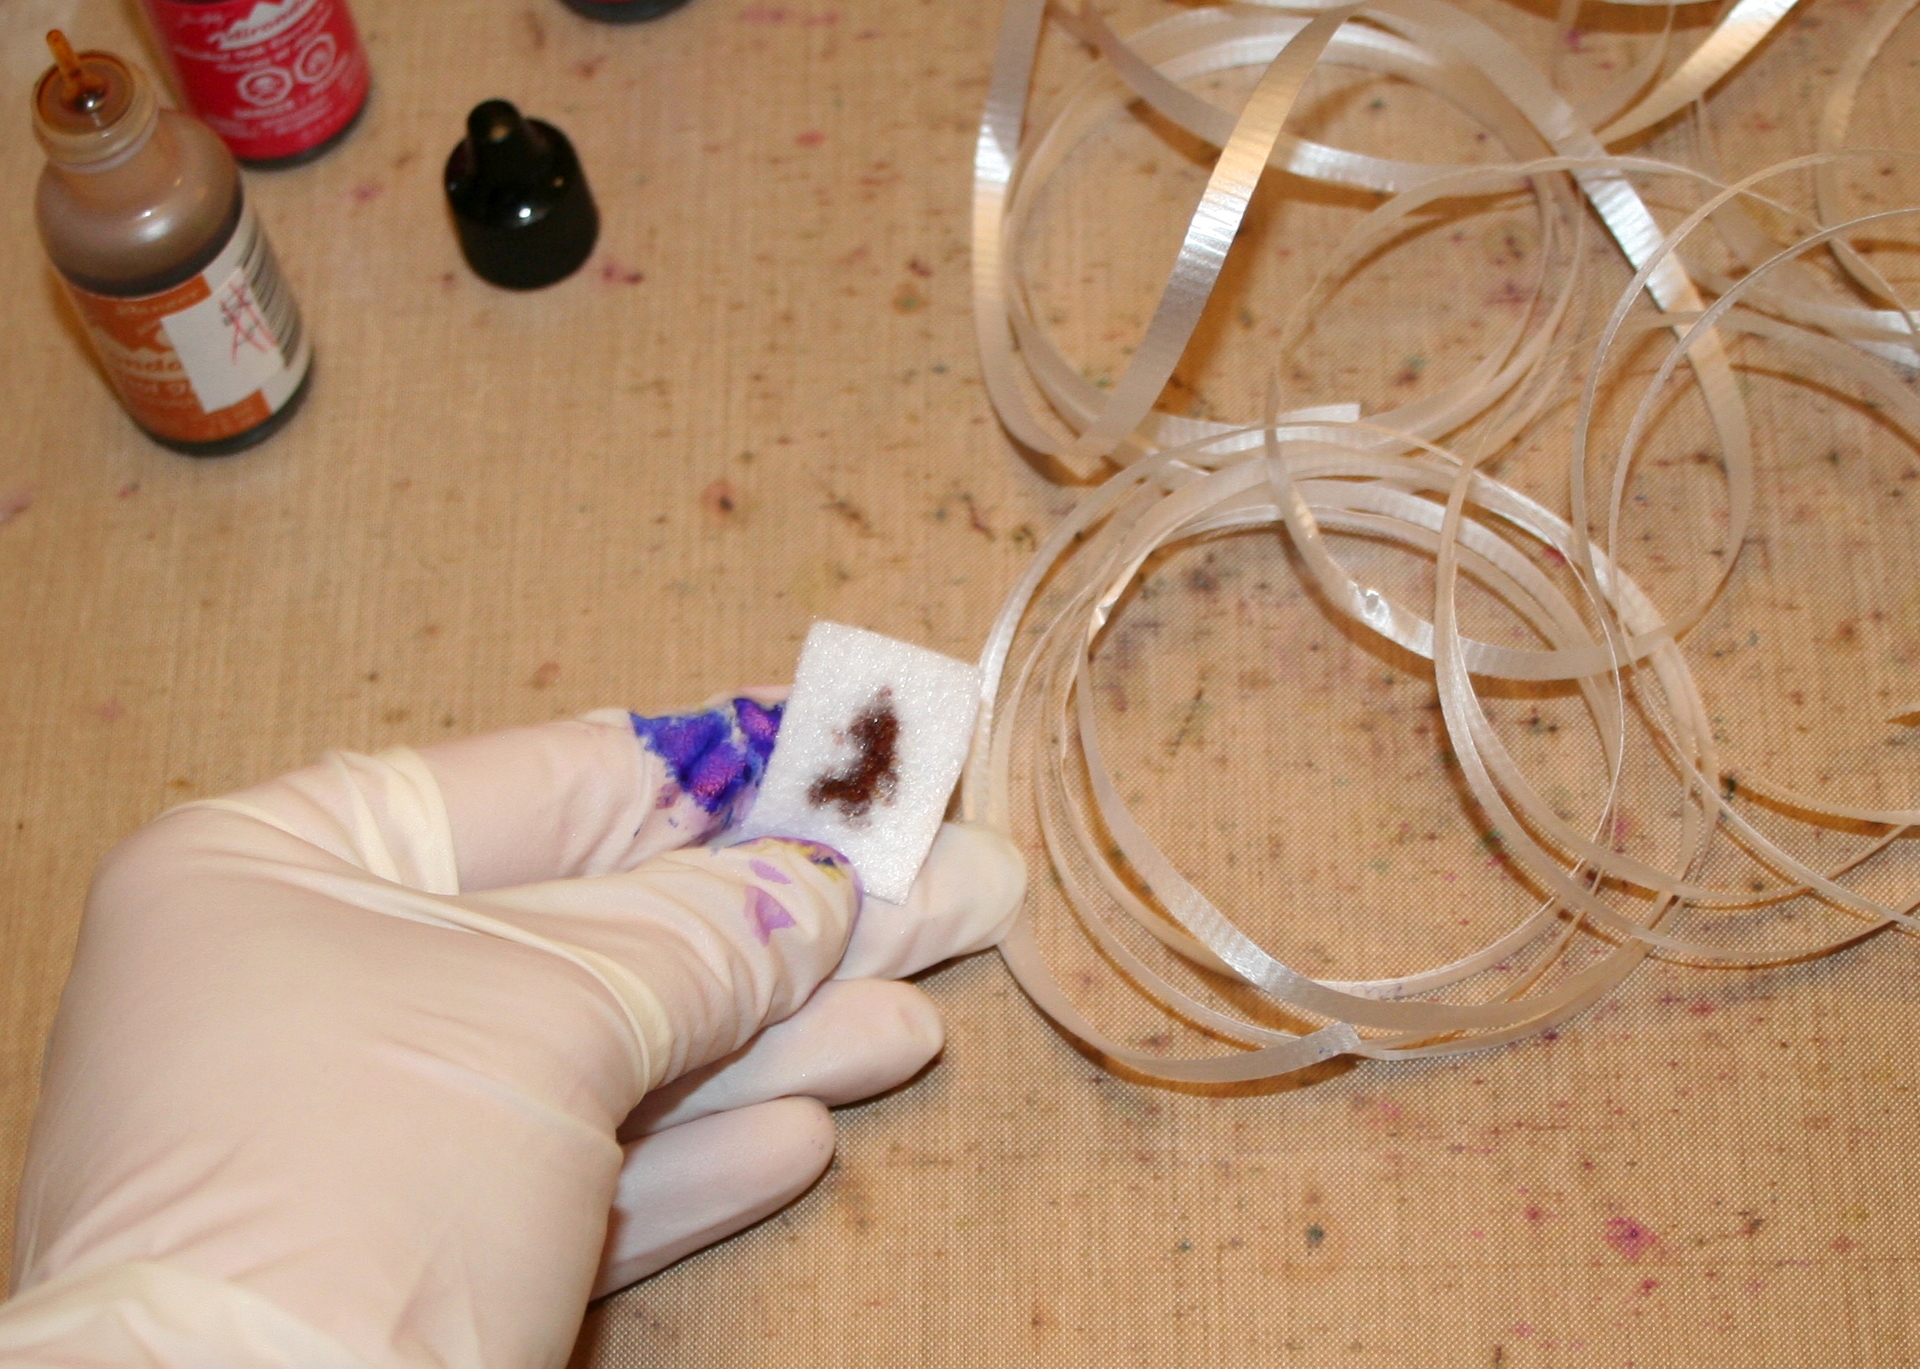
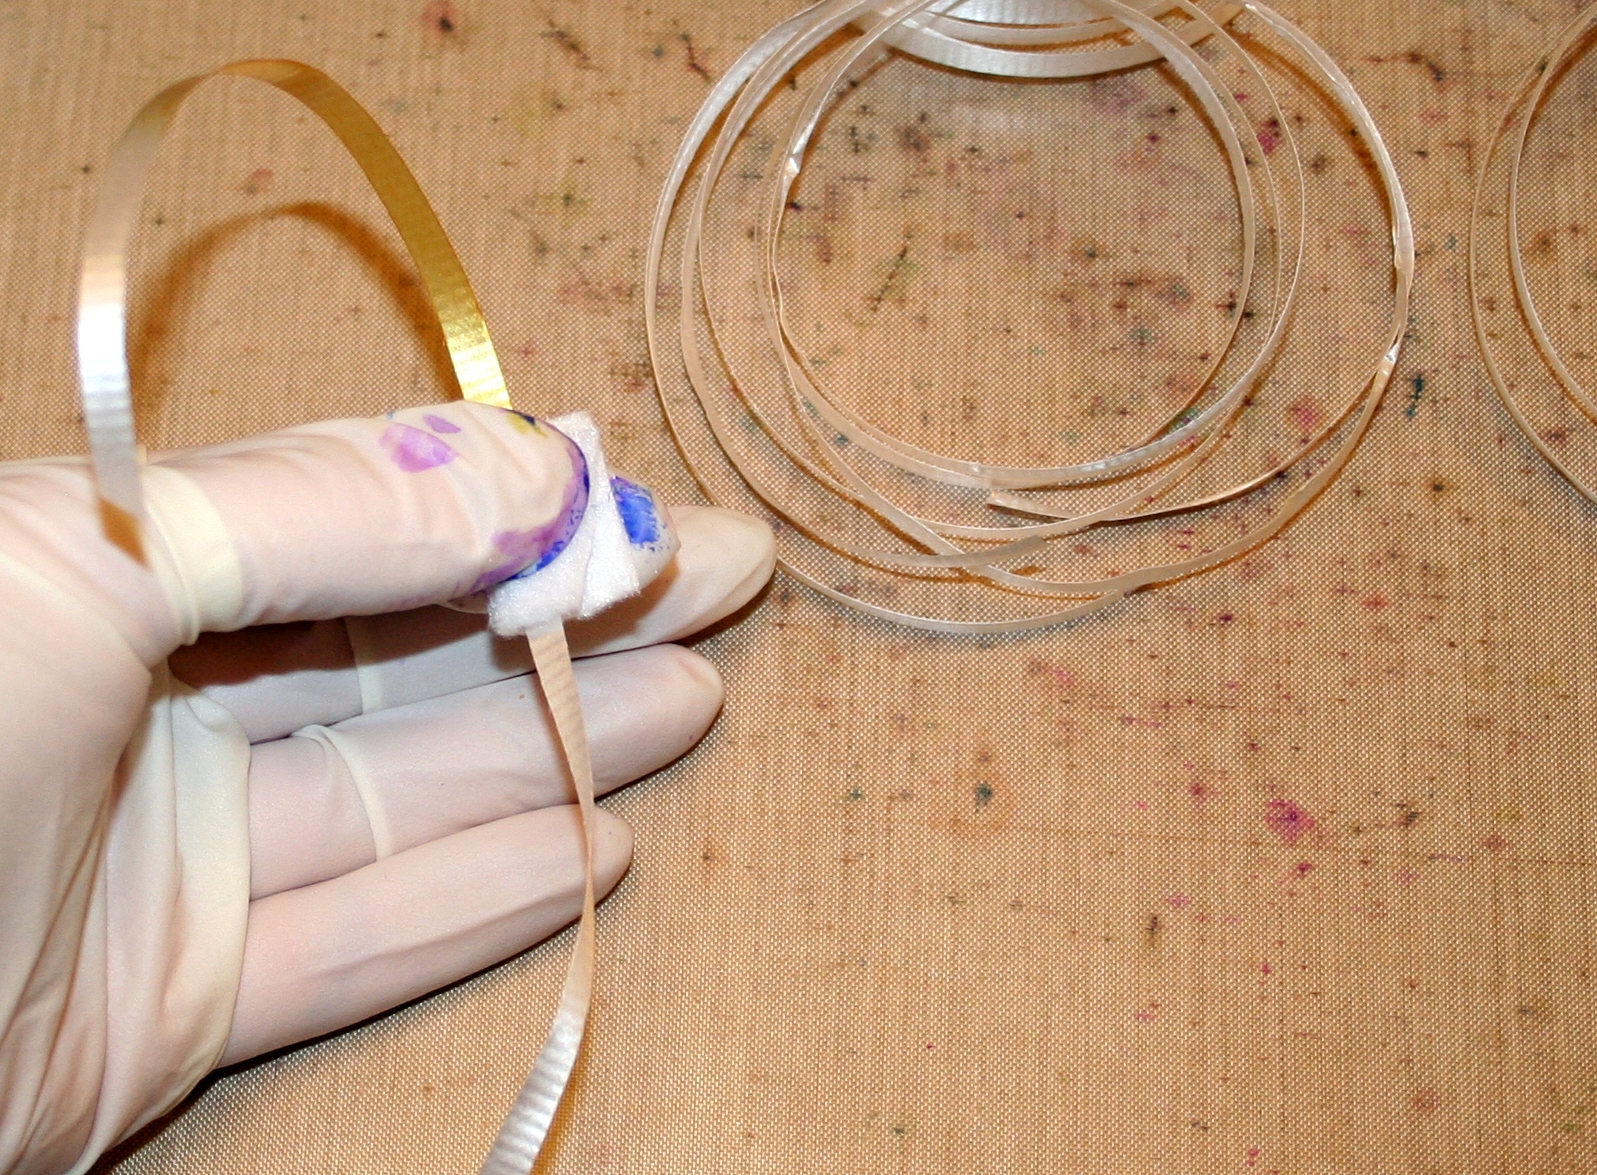 Wearing rubber gloves to protect my fingers from looking like I squeezed a rainbow, I held the felt piece between my thumb and forefinger and added a couple drops of the ink. I then placed the ribbon on the felt and folded the felt over. Holding a firm, but steady, grip I pulled the length of ribbon through. Repeat all the lengths of ribbon.
I would like to note here that you really do not need a lot of this ink. It goes a very long way. I was able to color a couple pieces of ribbon with only a drop or two.
One of the most fun parts of playing with this technique is the ability to change it up. For example you can hold the ribbon to the edge of the ink to only color one side of the ribbon. You could also get a really neat chunky look if you hold the ribbon in the felt for a few inches of length then remove the ribbon for a few inches. This would look neat with two different colors on one piece of ribbon!
There are endless possibilities for color combinations. Ranger’s Adirondack Alcohol Inks come in SO many colors. A great place to check out all the colors is the Ranger Ink Website.
If you are local to the Calgary Area, or in Alberta, we have a great store here in Calgary that stocks Alcohol Inks. The Scrap Yard is an incredible store that has an awesome selection. This store is run by some lovely ladies that have a passion for the craft. If any of you Canadians are thinking of ordering online from some of the wonderful American stores, be aware of Customs and the time it takes to process the packages. I have found it to be a slow process, though my order with Alcohol Inks did arrive.
Ok, We’re a bit off topic! Back to the process of making these ribbon clusters…
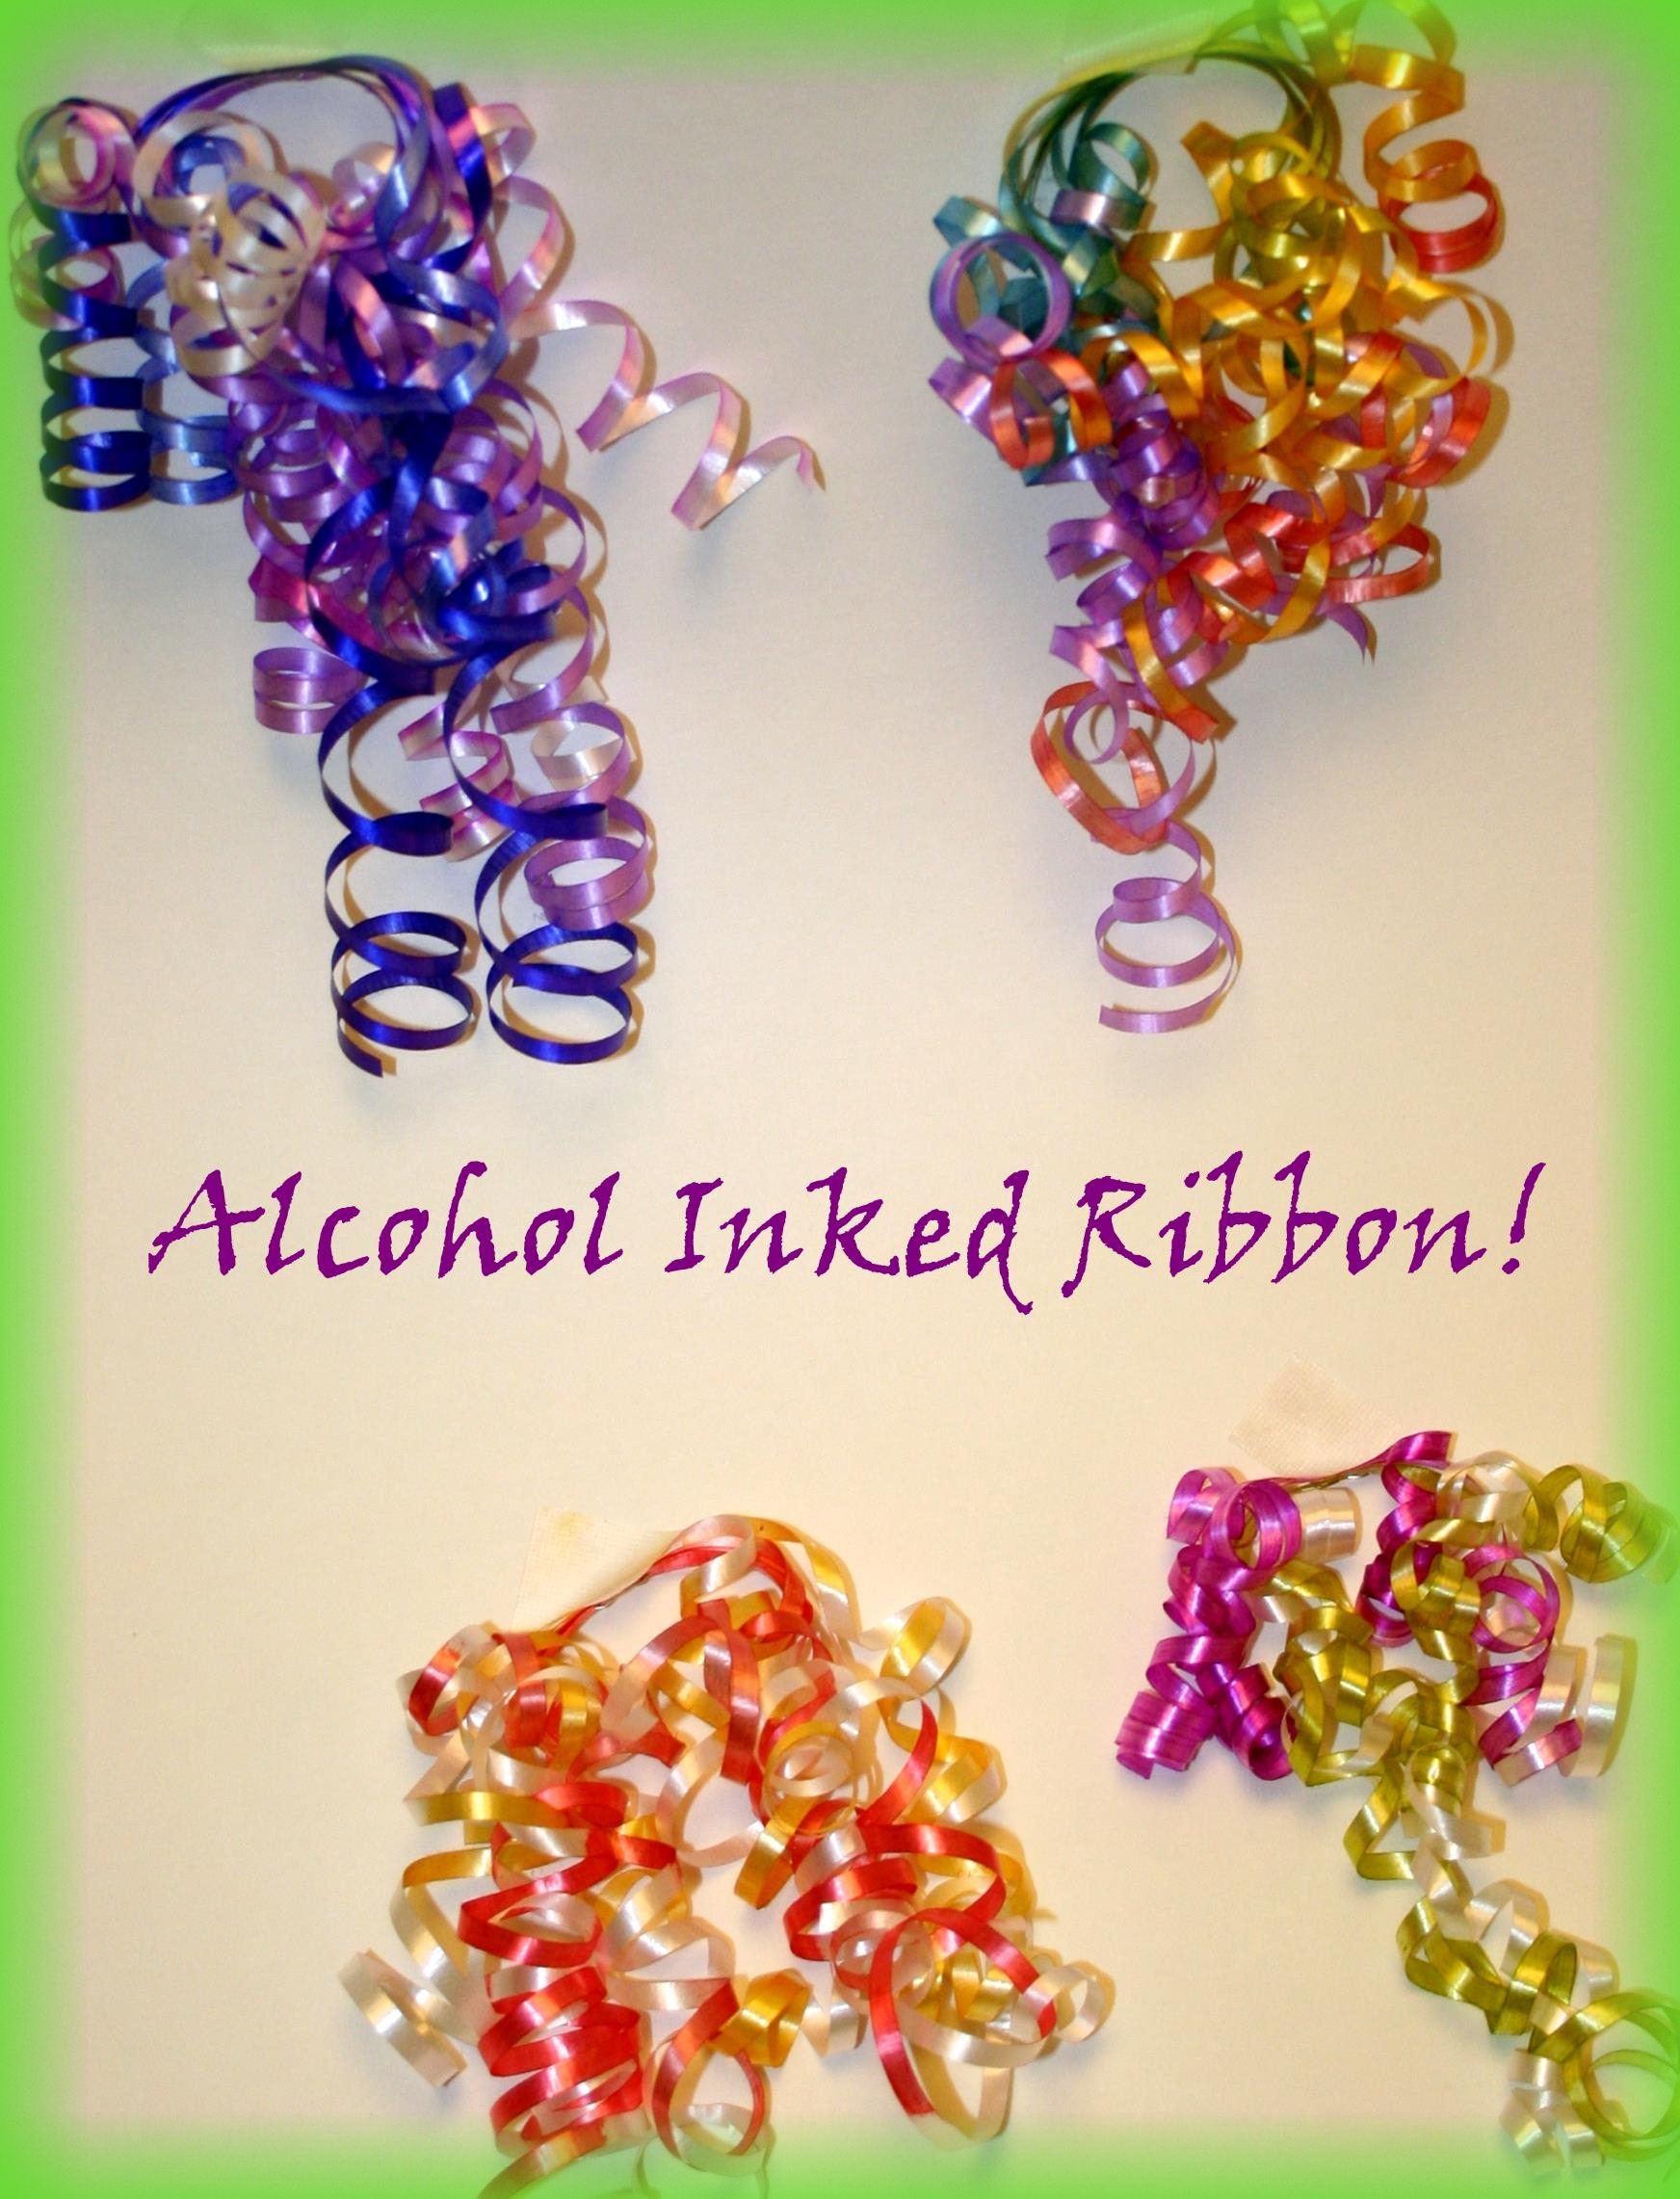
Once the ribbon is the color I wanted, I stacked the ribbon one on top of the other and held it steady on the edges. I stapled the center of the ribbon. To get that bouncy curl, I used the tried and true method of running each of the ribbon pieces along the edge of a blade from a pair of scissors (being careful to not cut myself, of course!). To clean up afterward was easy. The felt pieces went into the trash and I used a wee bit of hand sanitizer to clean up the ink on my craft mat and scissors. Since the inks react to alcohol, hand sanitizer is a great, cost effective cleaning solution.
Another fun detail you can add if you like is to color the staples. You can use the same ink to color the staples that you used to color the ribbons. Aren’t these inks the best thing ever?!
With so many options, I found myself trying a rainbow effect. I do believe it is my favorite, but I know there will be lots more made!
What kind of Alcohol Ink techniques are you in love with? Feel free to leave a comment here on the blog or on the Loving Expressions Facebook page! We’d love to hear from you.
Materials Used:
- Ranger Adirondack Alcohol Ink (Colors include Cirtus, Wild Plum, Sailboat Blue, Indigo, Purple Twilight, Watermelon, Red Pepper, Butterscotch and Sunshine Yellow)
- White Plastic Gift Wrap Ribbon
- Rubber Gloves (found at my local pharmacy)
- Stapler
- Scissors
