Hello!
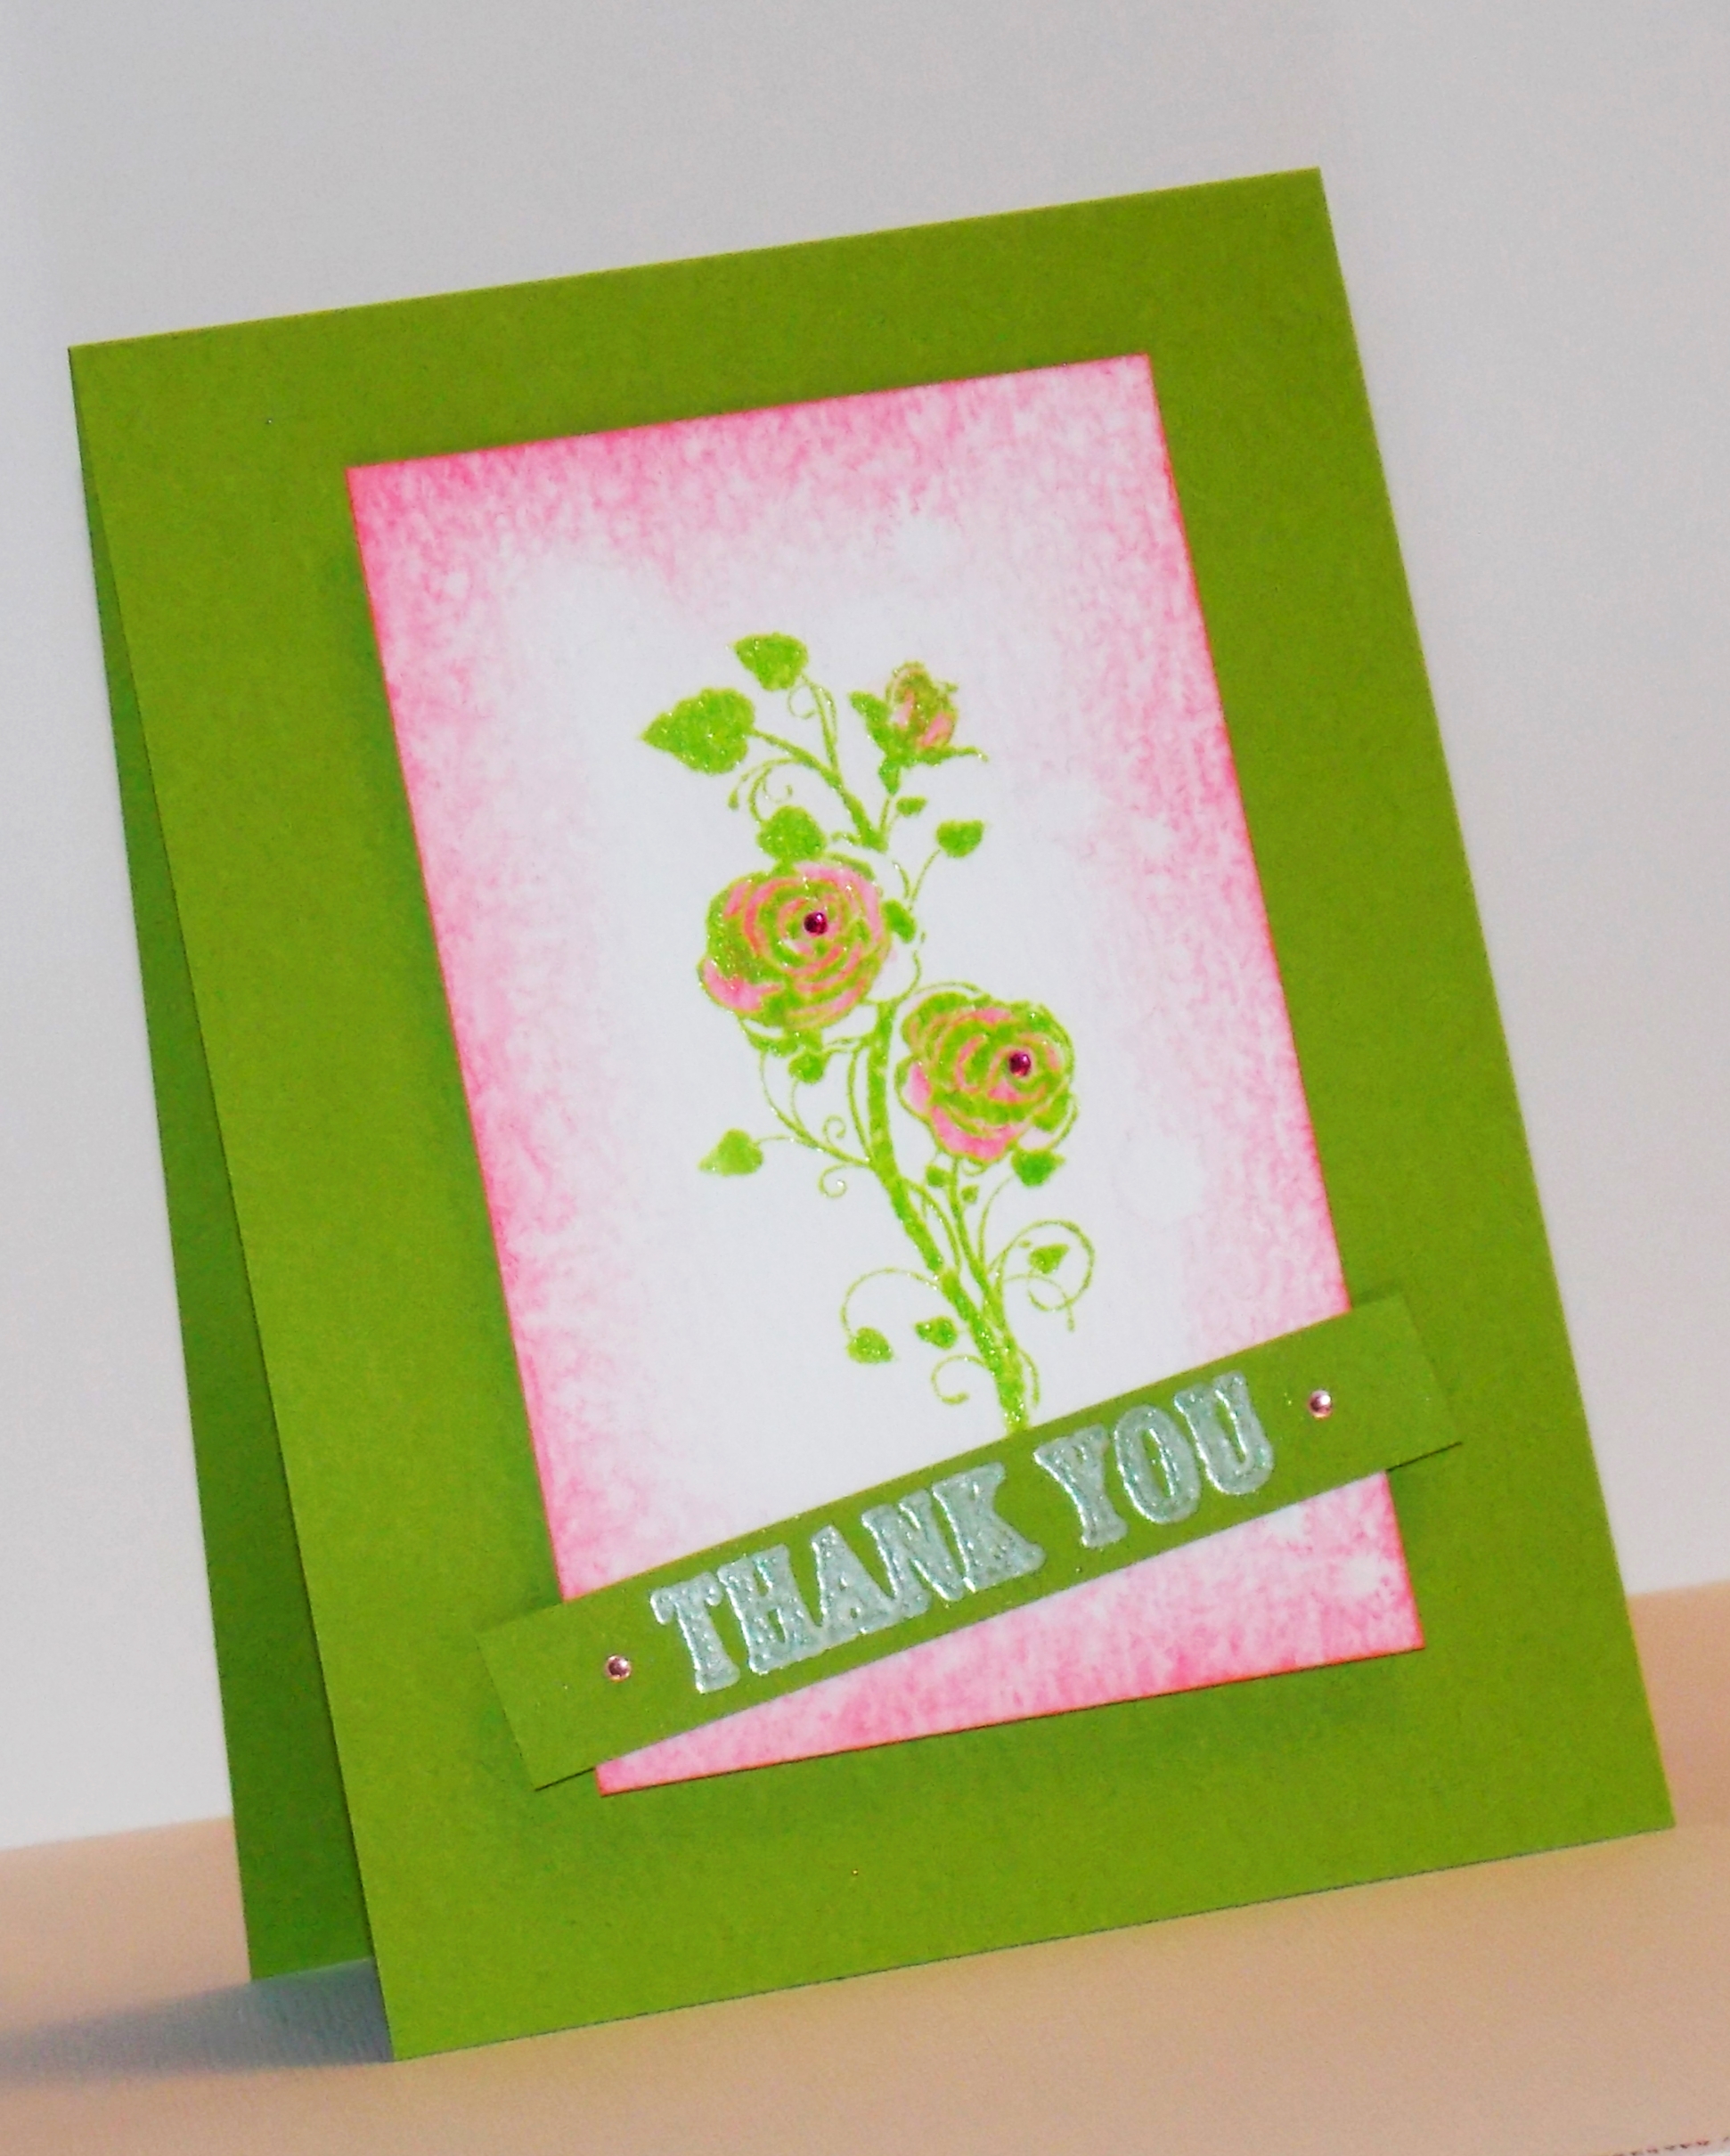
So I was looking to make a nice thank you card for a friend and wanted to put together something simple and pretty. I love a good pink and green color combination so I decided that was where I am going to start. I chose a pretty stamp that was a gift included in Cardmaking and Papercraft Magazine (Issue 142) and the shades of color I wanted and got to work.
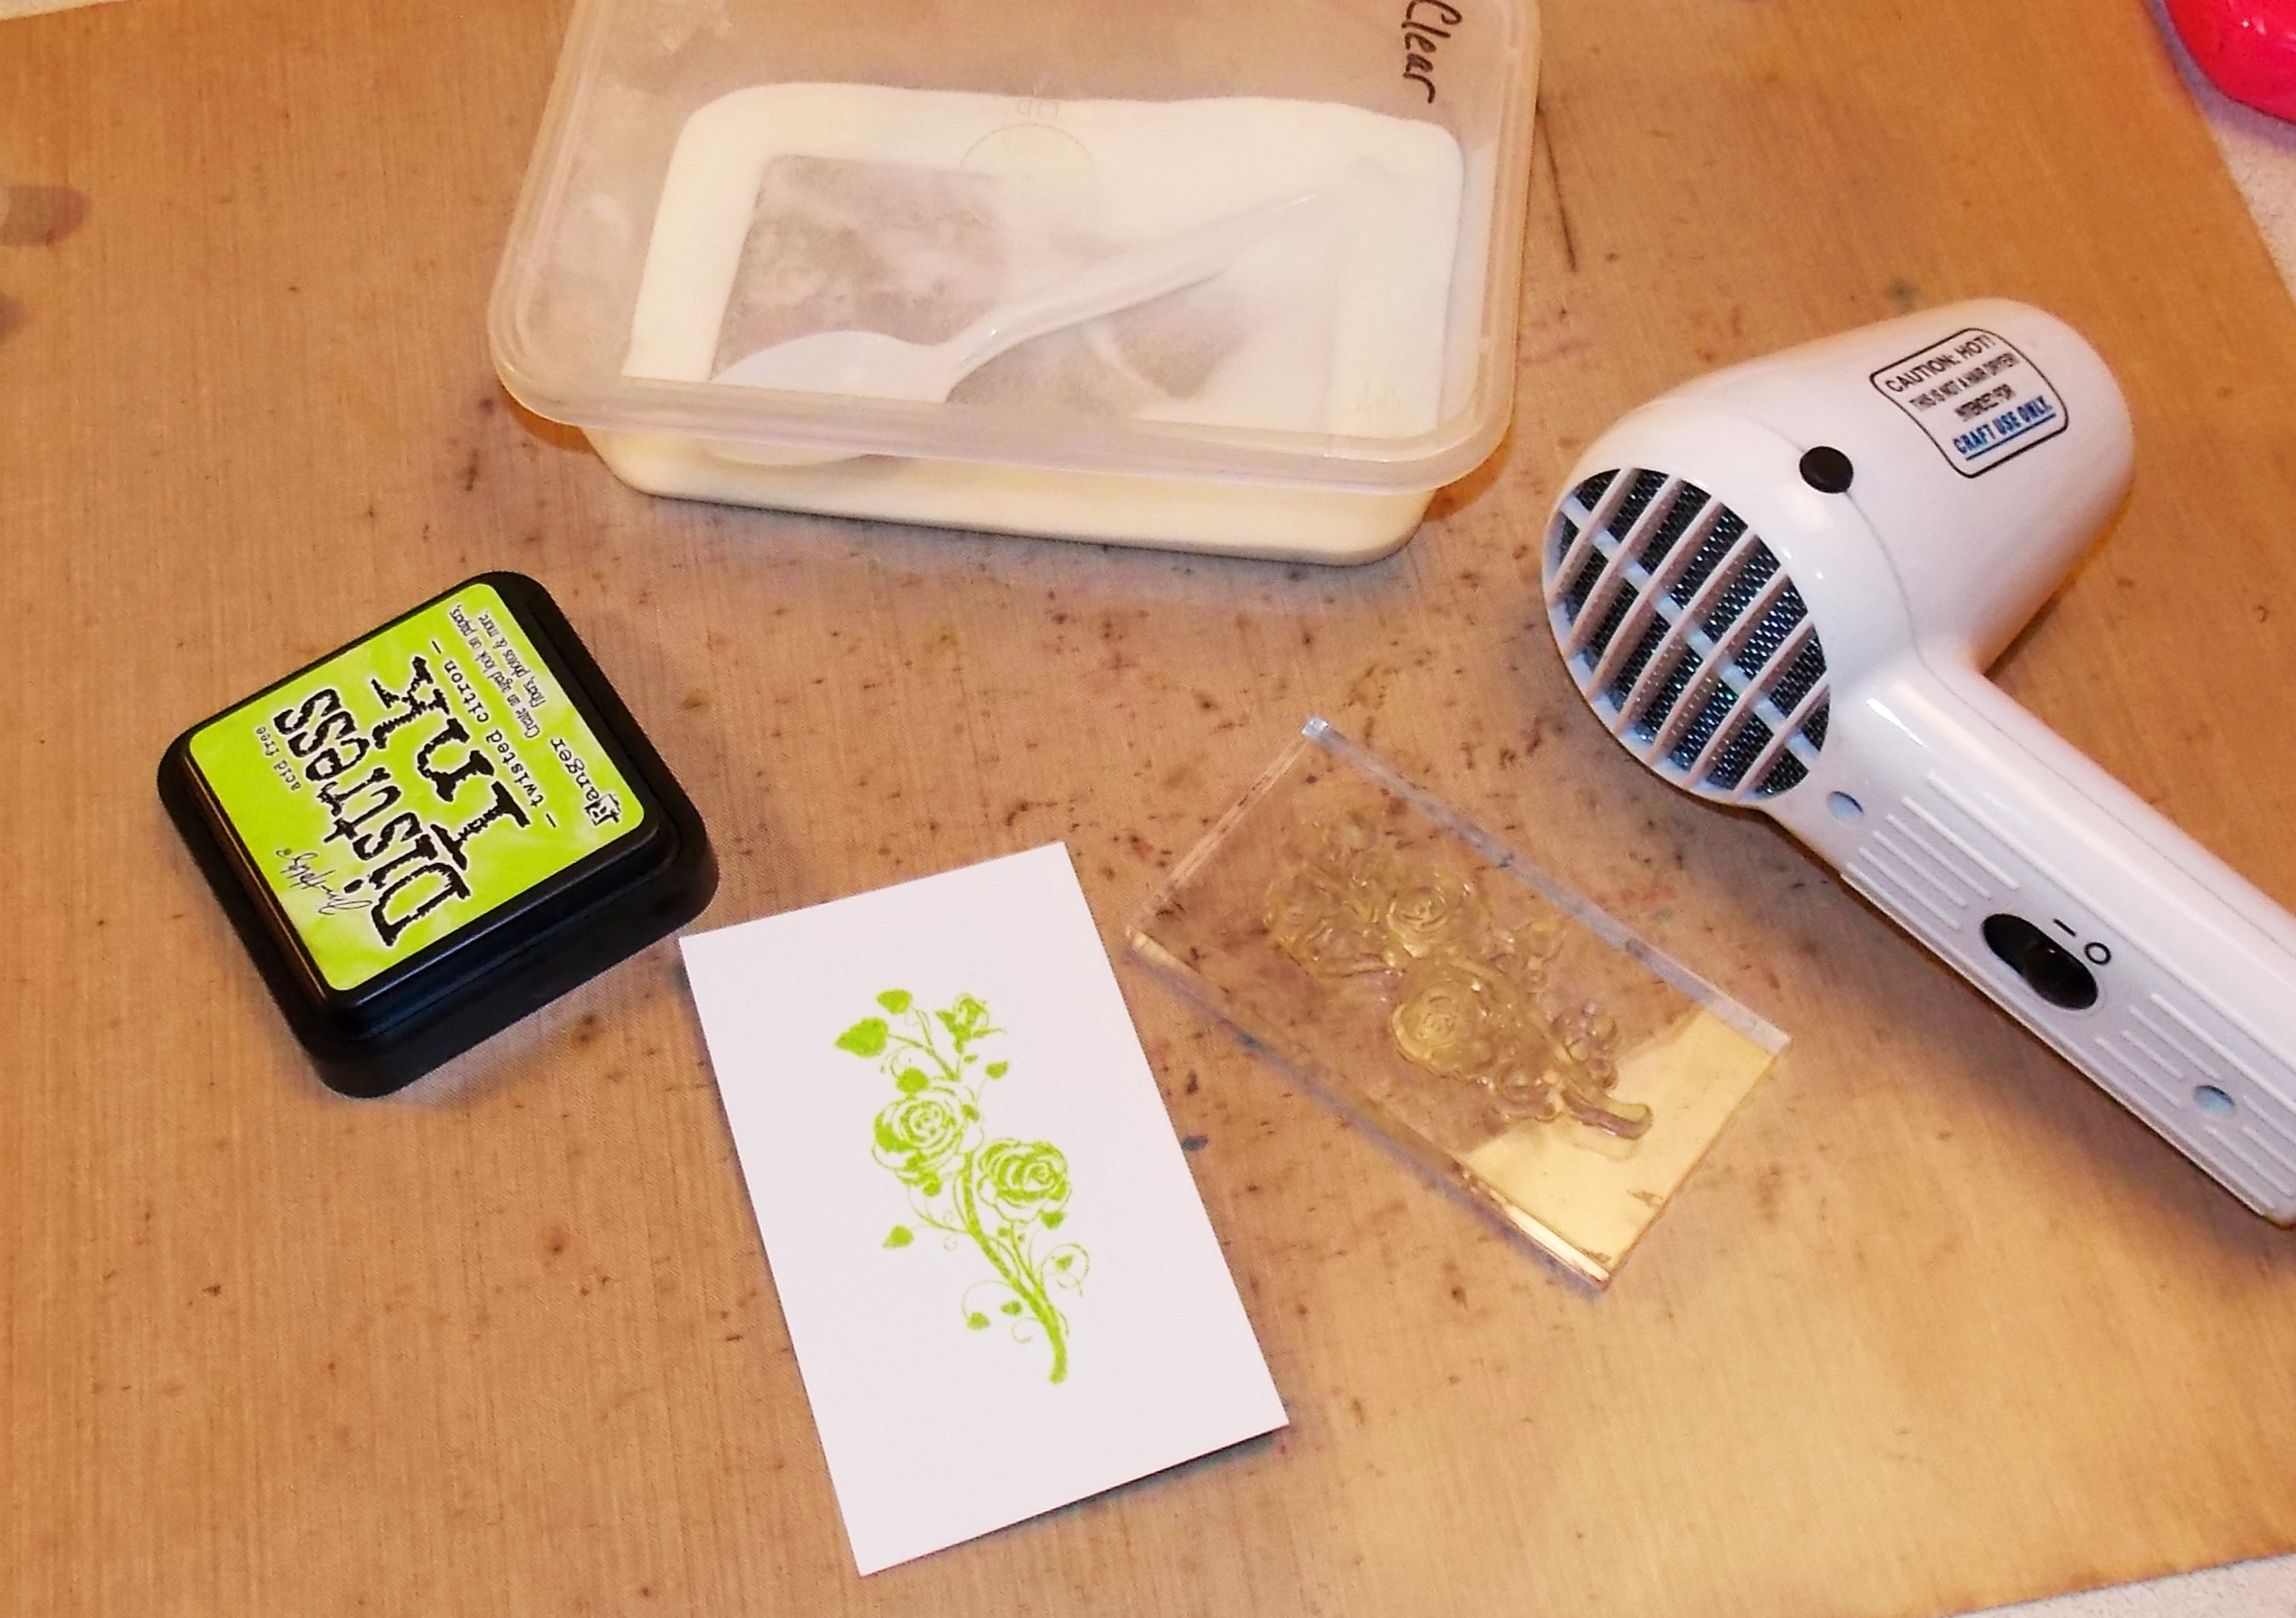 I started by stamping the image with Ranger Distress Ink Twisted Citron onto a piece of Ranger watercolor paper. I really love the Ranger brand of watercolor paper as it’s a very clean shade of white. There are some great watercolor papers out there, and I do have a good collection, but I love just how white the Ranger watercolor paper is. As the image was still wet, I sprinkled on some clear embossing powder and heat set it.
 Next I pulled out my Worn Lipstick Distress Ink and marker. Using the marker I highlighted the roses in the stamped image. I then sprayed the pink areas with a light misting of water to soften the pink and give it a bit more of a watercolor look. Be careful of this though, as the ink under the embossing powder is going to bleed a bit. If you are looking for a crisp image. this is definitely a step to skip. After blotting up the excess and letting it dry for a little bit I used a blending tool and added the pink border around the image. I did this using a circular motion from the outside in using light amounts of ink and pressure, repeating the process until I had the shading I liked.
 I then took a spritzer of water and sprayed my hand to flick some water onto the image. This was to give it that slightly worn and distressed look. I blotted up the excess again before the ink could wick too much and gave the image a quick blast with the heat tool, being careful not to re-melt the embossing powder.
Ready to start building my card, I created a card base using Bazzill Cardstock. I trimmed my card to 5.5 inch by 4.25 inch. Using a piece of craft foam for dimension I attached the image to the green note card. For this card I used the craft foam that has adhesive on one side which makes it very quick and easy to use. For the un-sticky side, I simply used my trusty double sided tape.
 To add the sentiment, I used a strip of scrap cardstock from making my notecard and stamped the “Thank You” sentiment using white Hero Arts pigment ink. I then embossed the sentiment using Wow White Pearl embossing powder. After trimming the strip I added it to the card using double sided tape and a couple pieces of craft foam on the ends so that the ends would not bend over. To finish the card off, I used a couple of Recollections Adhesive Rhinestones on the sentiment and to the center of the roses and voila! Pretty card to go to a very wonderful friend.

Materials Used:
- Ranger Watercolor Paper
- Bazzill Cardstock
- Ranger Distress Ink- Worn Lipstick and Twisted Citron
- Ranger Distress Marker-Worn Lipstick
- Hero Arts Hero Hues Pigment Ink-Unicorn
- Fiskars So Much Thanks stamp set
- Cardmaking and Papercraft Magazine bumper gift roses stamp (Issue 142)
- Wow White Pearl Embossing Powder
- Recollections Clear Embossing Powder
- Ranger Heat Tool
- Ranger Heat Resistant Craft Mat
- Double sided tape
- Recollections Adhesive Rhinestones
- Foam Tape
- Craft Foam
